Where everything is and how to do each thing, screen by screen and setting by setting.
Nothing in the guide matches.
Your first steps
Your first steps
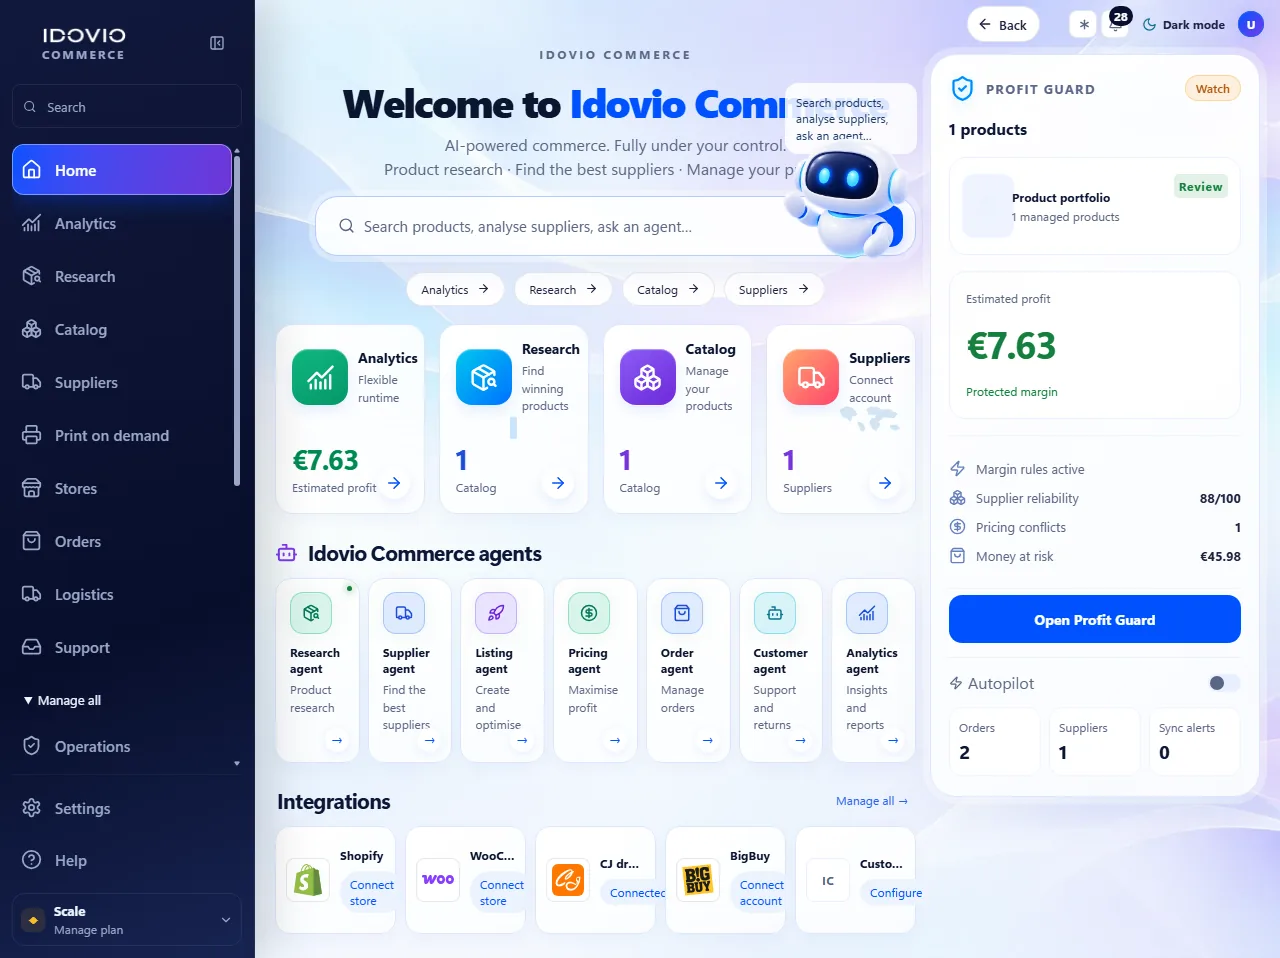
Where it isSide menu›Home
What it is forThree things are enough to start: a store, a supplier and your margin rule. Everything else can wait.
How to do it
Connect your first store
Connect a supplier or warehouse
Configure Profit Guard
Screenshots show the interface in English.
Screens
Home
Where it isSide menu›Home
What it is forThree things are enough to start: a store, a supplier and your margin rule. Everything else can wait.
Screenshots show the interface in English.
Operations
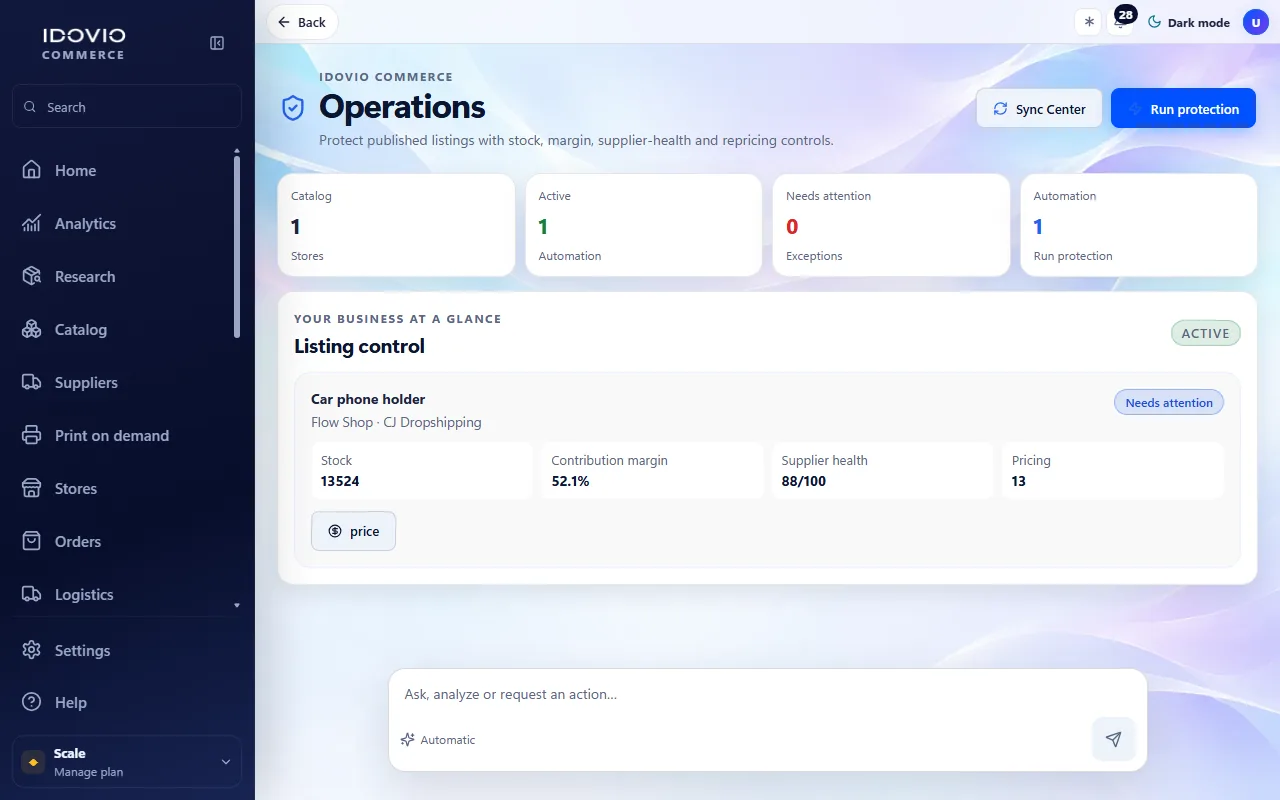
Where it isSide menu›Operations
What it is forAutomations do the repetitive work by rules, with no need for AI. You decide how much they may do on their own.
How to do it
Open Automations and choose what to automate: stock, prices, routing, tracking or exceptions.
Start in “Dry run”: you see what would happen and nothing is changed.
Then use “Approval”: each action waits for you to press “Approve” until you trust the rule.
Screenshots show the interface in English.
Analytics
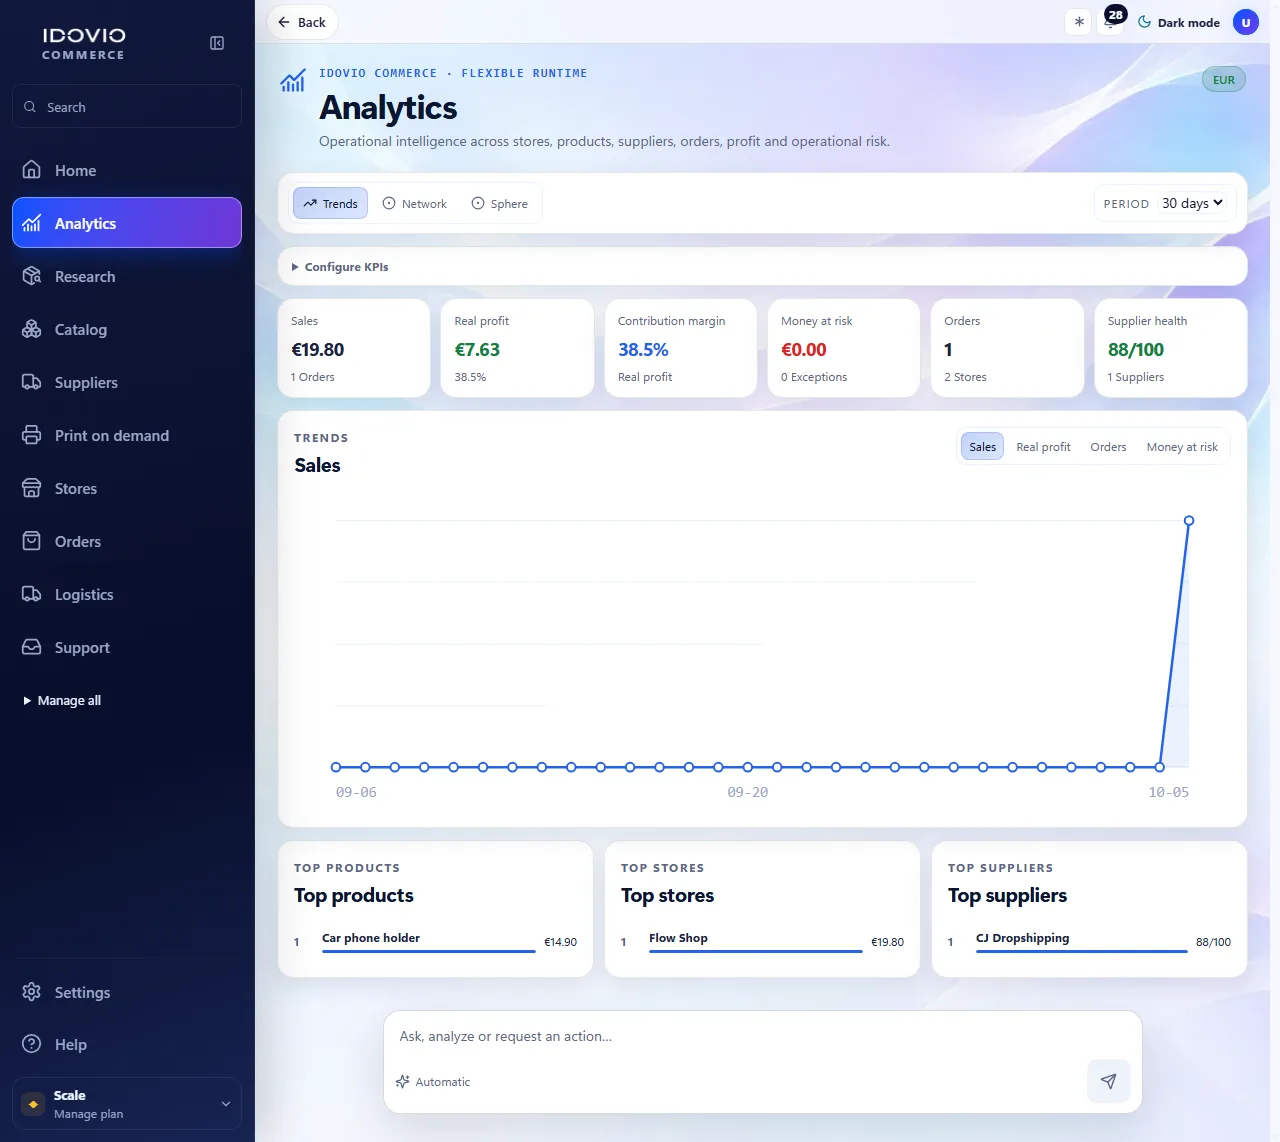
Where it isSide menu›Analytics
What it is forEvery publication and every price change is checked against your minimum margin, using the real product and shipping costs.
How to do it
Set your “Minimum contribution margin”.
From then on, a listing or a price change below that margin is blocked, and you are told why.
Open Profit to see the margin of each product and each order.
Screenshots show the interface in English.
Research
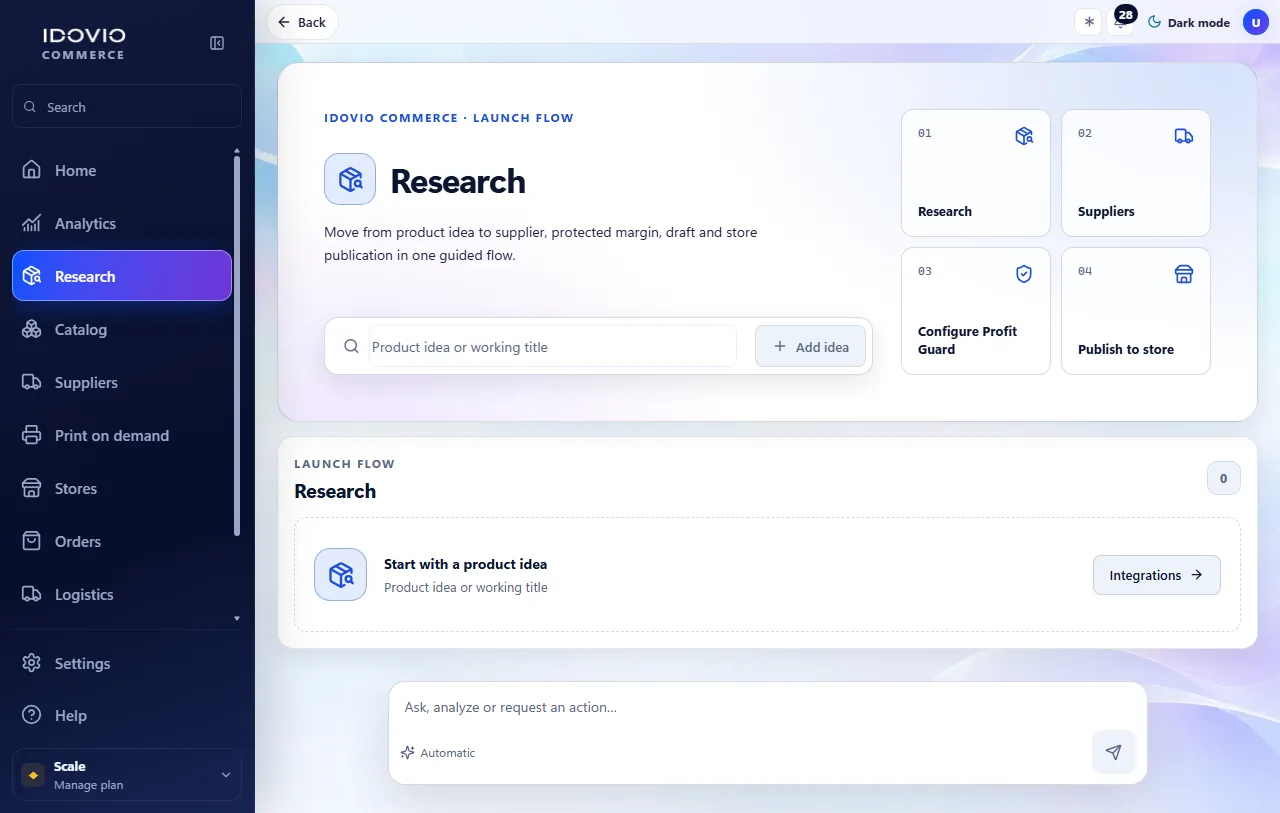
Where it isSide menu›Research
What it is forLaunch Flow takes one product from idea to your store and stops you before publishing anything that loses money.
How to do it
Open Research and start with a product idea or with a product from a supplier.
Choose one of the supplier matches. The margin is calculated with the supplier's real price and shipping.
When you see “Profit Guard passed”, press “Publish to store”. If you see “Profit Guard blocked”, change the price or the supplier.
Screenshots show the interface in English.
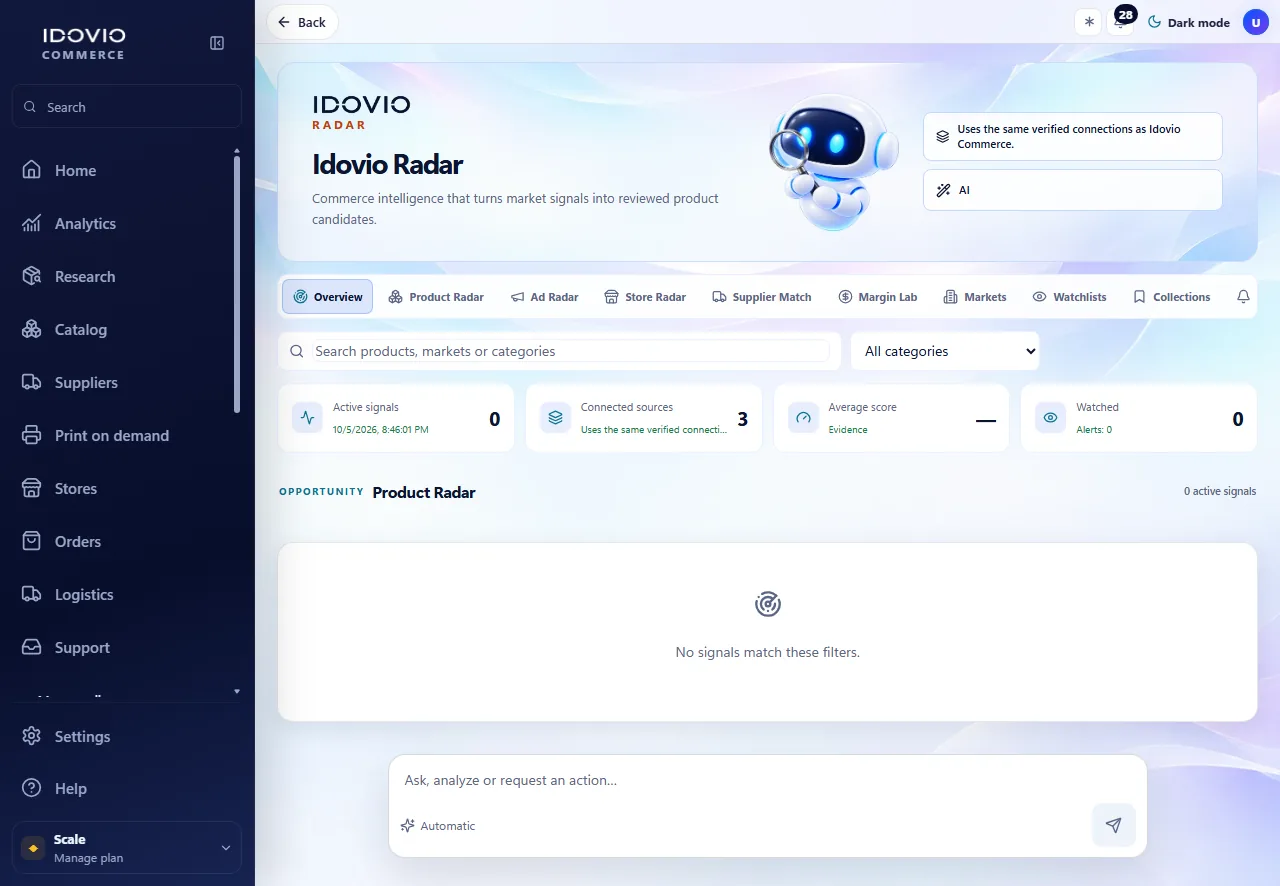
Idovio Radar
Where it isSide menu›Idovio Radar
What it is forFinds products worth selling by watching demand, competition and margin signals.
Screenshots show the interface in English.
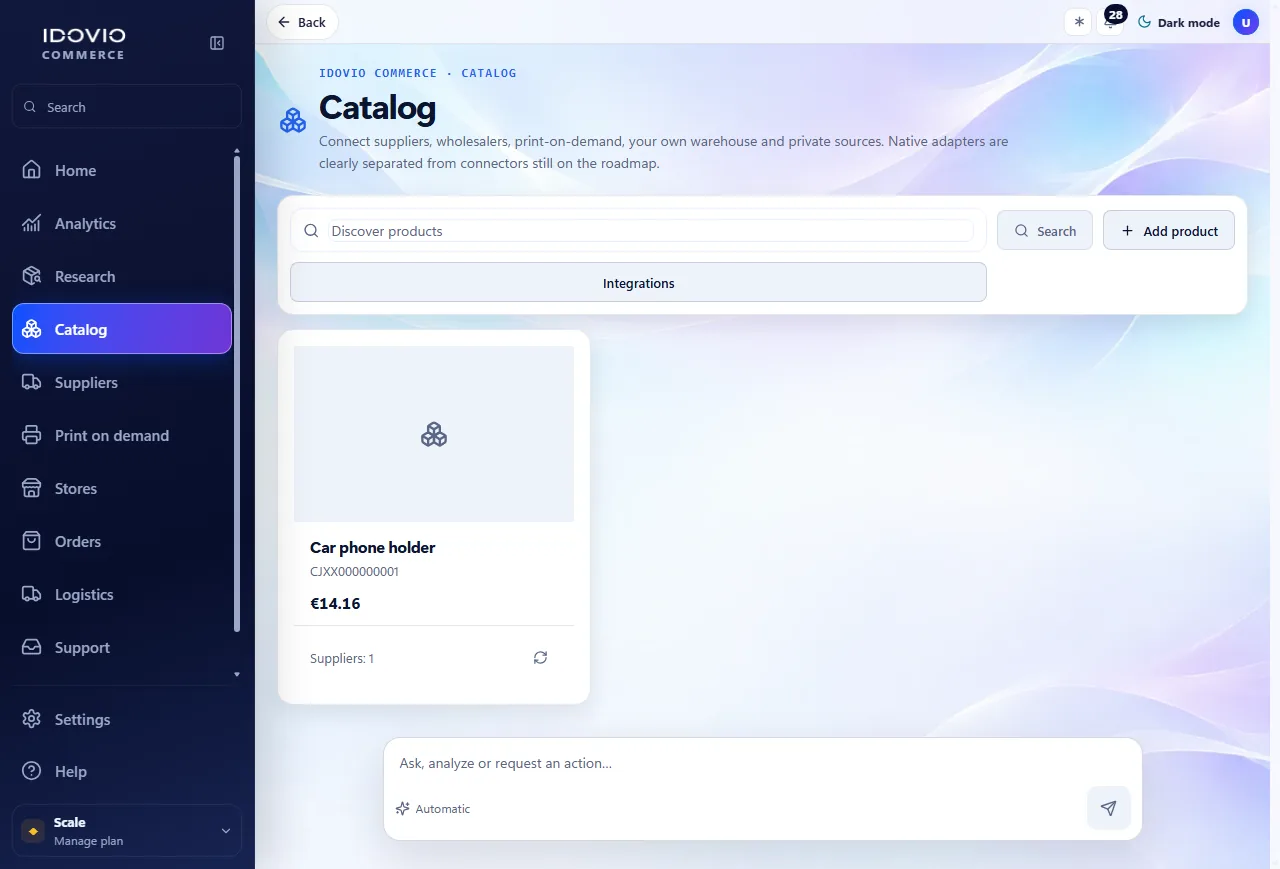
Catalog
Where it isSide menu›Catalog
What it is forLaunch Flow takes one product from idea to your store and stops you before publishing anything that loses money.
How to do it
Open Research and start with a product idea or with a product from a supplier.
Choose one of the supplier matches. The margin is calculated with the supplier's real price and shipping.
When you see “Profit Guard passed”, press “Publish to store”. If you see “Profit Guard blocked”, change the price or the supplier.
Screenshots show the interface in English.
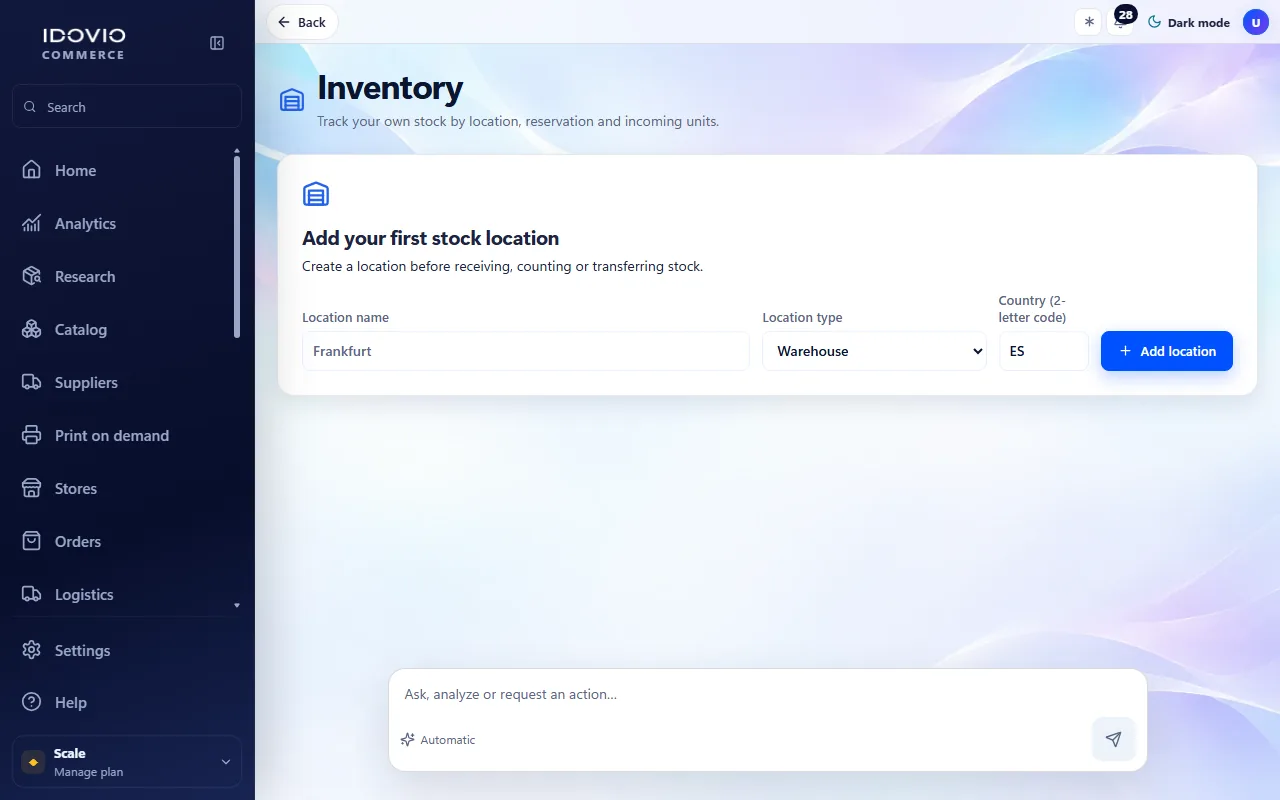
Inventory
Where it isSide menu›Inventory
What it is forTrack your own stock by location, reservation and incoming units.
Screenshots show the interface in English.
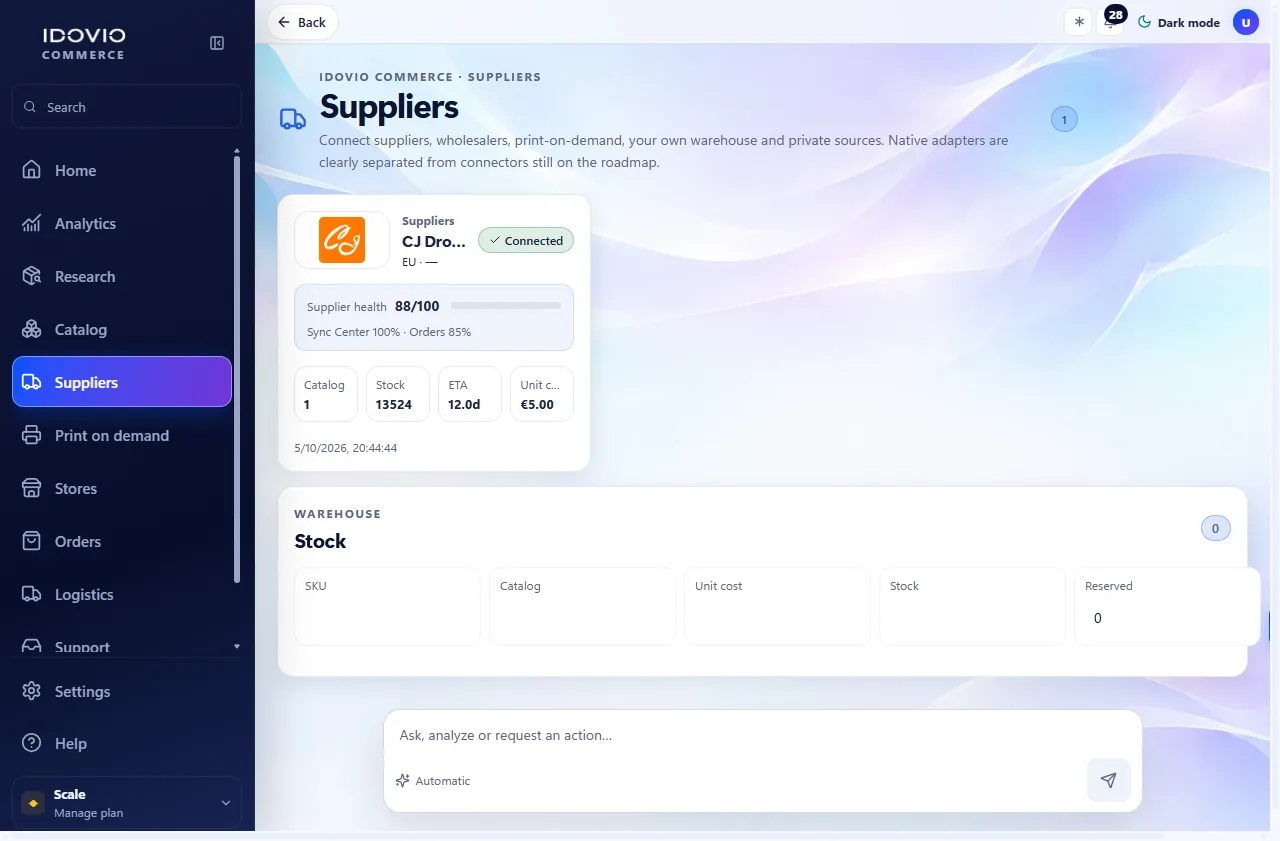
Suppliers
Where it isSide menu›Suppliers
What it is forSuppliers and wholesalers connect with a key issued to your own supplier account. The key is stored securely and is never shown again.
How to do it
In your supplier account, create or copy the API key. The “Official API documentation” link on each card takes you to the provider's instructions.
Open the supplier's card in Integration Hub, paste the key and press “Connect”. The key is tested with a real call before it is saved.
Where the supplier offers a test mode, start with it: test orders are never charged.
Screenshots show the interface in English.
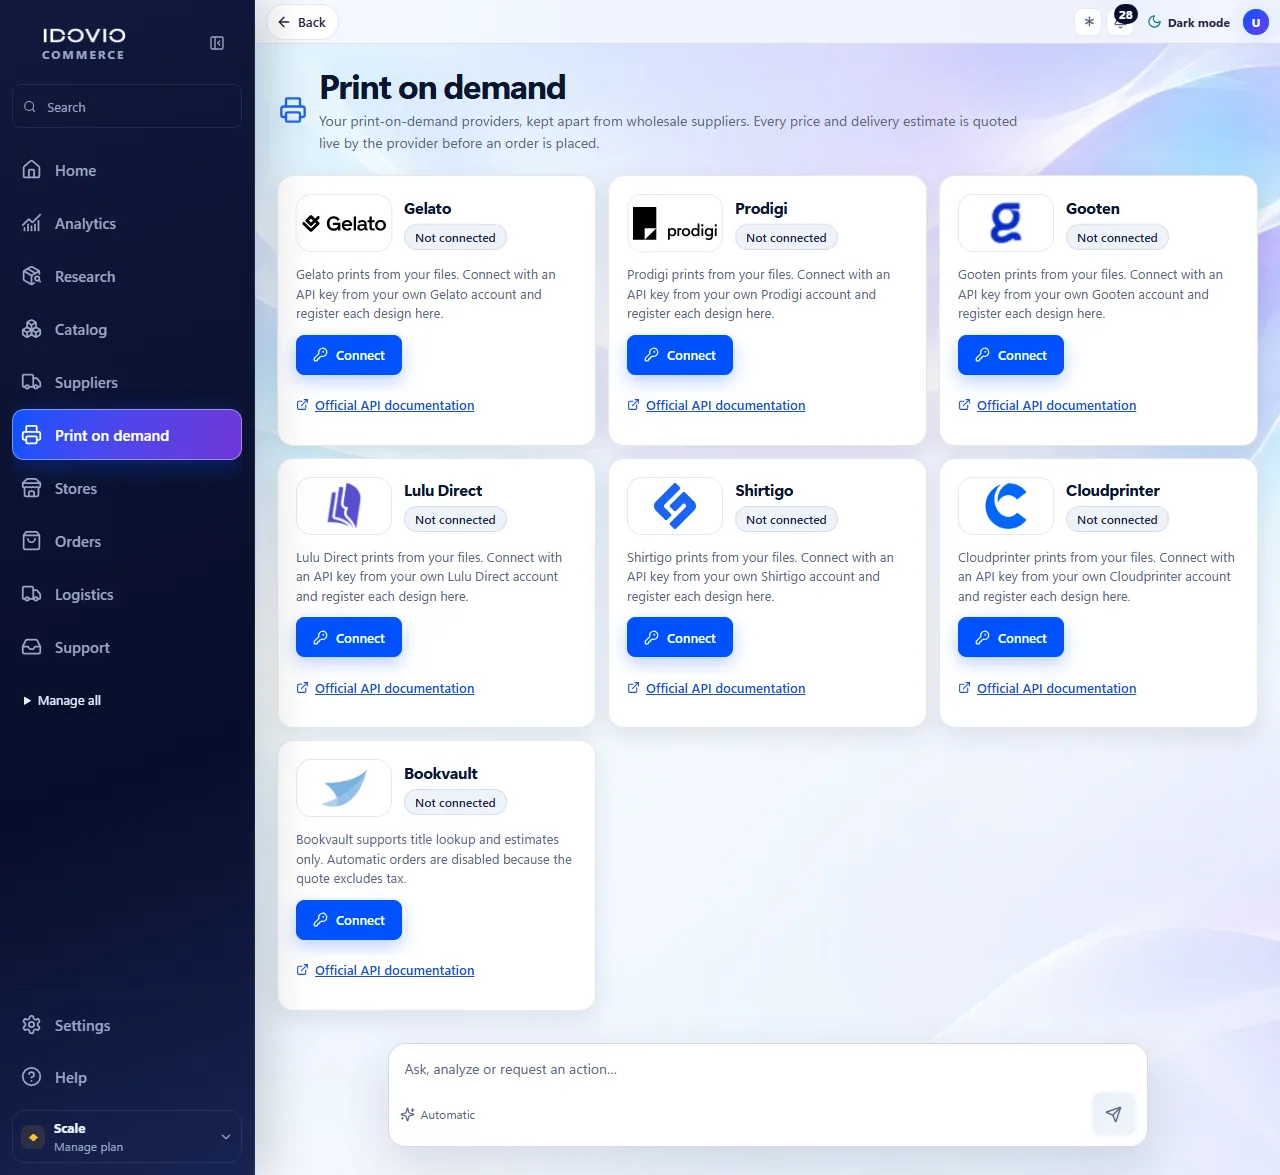
Print on demand
Where it isSide menu›Print on demand
What it is forPrint-on-demand providers are kept apart from wholesale suppliers. Prices and delivery times come from the provider itself.
How to do it
Connect the provider with the key from your own account and turn on “Sandbox mode (test orders, no charges)” to try it without charges.
Press “Add design” and give each design its name, its product code and its print file.
Press “Check live price” to see the real price and shipping before you sell it.
Screenshots show the interface in English.
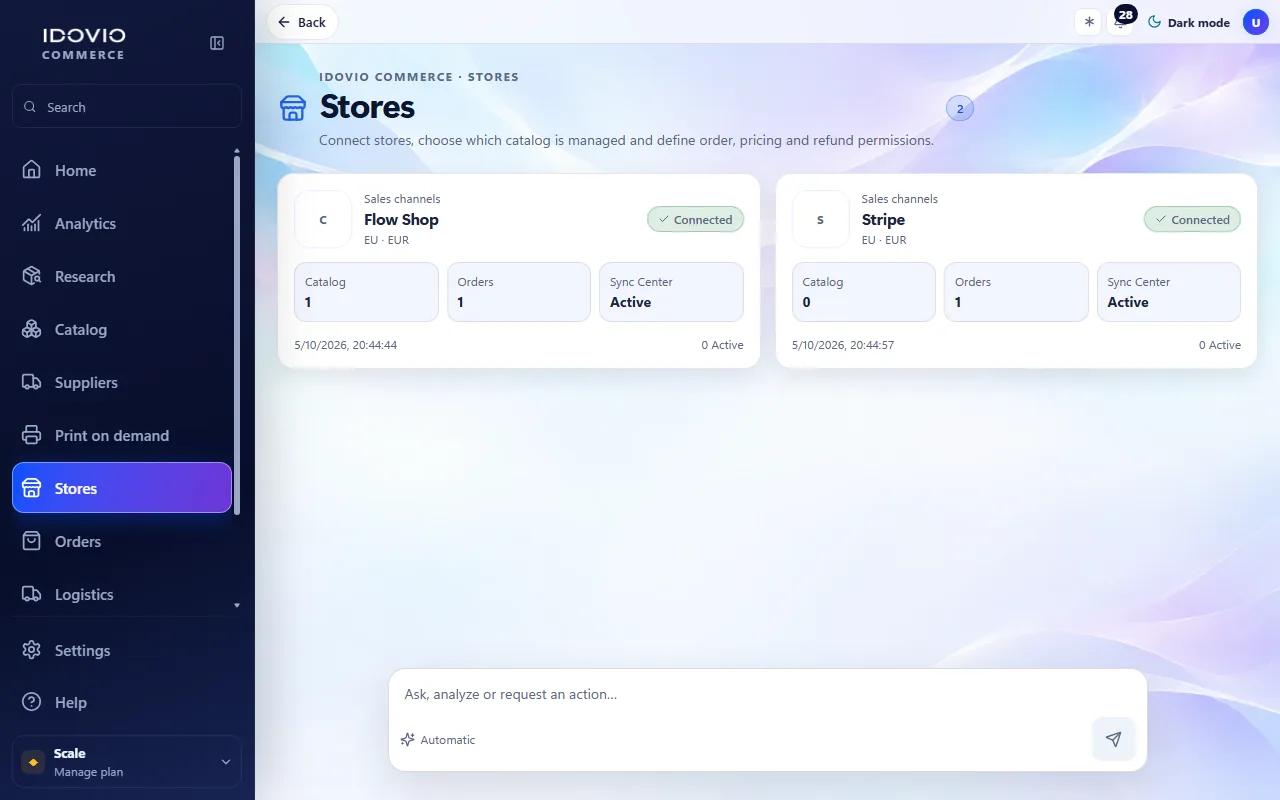
Stores
Where it isSide menu›Stores
What it is forEverything you connect lives in one place. A connection only shows as connected after a real check against your account.
How to do it
Open Integration Hub, search for your store or marketplace and open its card.
Press “Connect”. If the provider offers sign-in, you approve access on its own page; if it works with a key, paste the key from your own account. Only the minimum data is asked.
When the card shows “Connected”, press “Sync now” to bring in your products and orders. If it shows “Reauthorization required”, press “Reconnect”.
Screenshots show the interface in English.
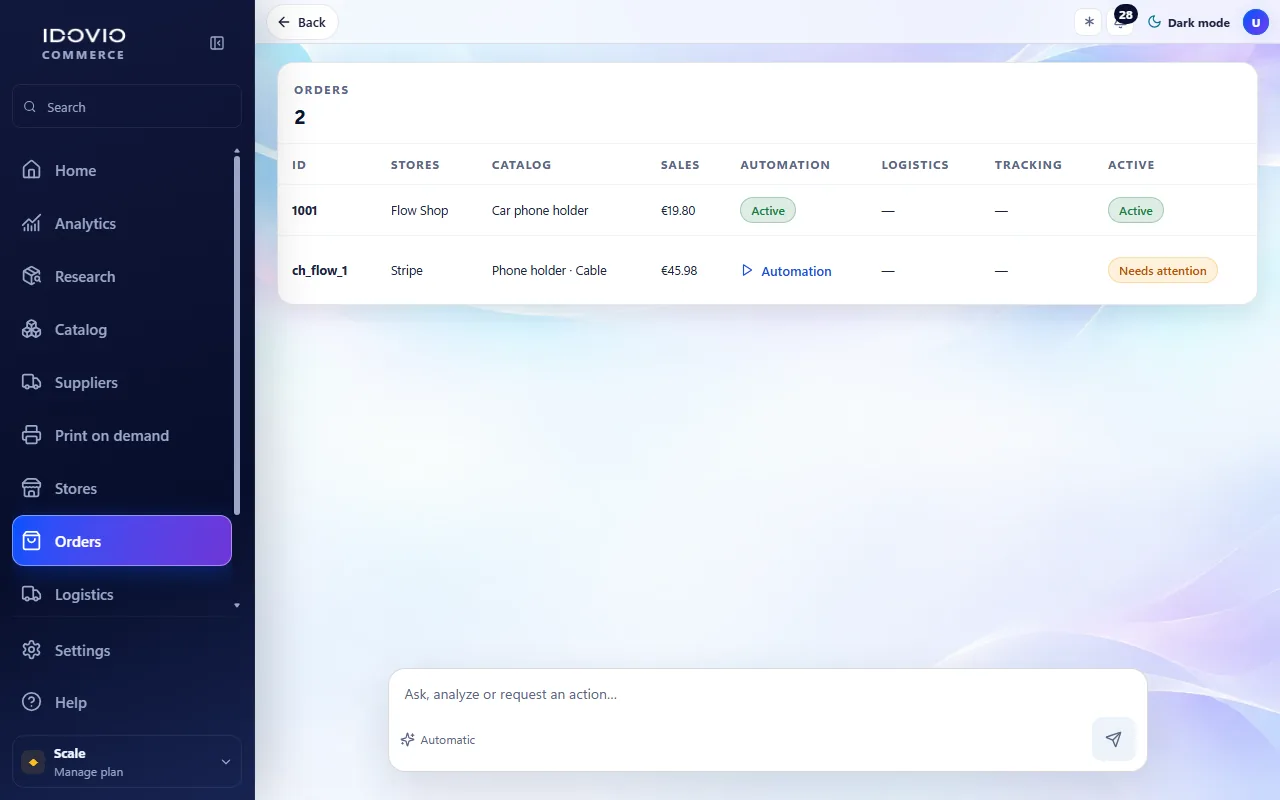
Orders
Where it isSide menu›Orders
What it is forOrders arrive from your connected stores on every sync. Each one is tied to its product and to the supplier that fulfils it.
How to do it
Open Orders and choose the order. You see its product, supplier, cost and margin.
Send it to the supplier. Anything that spends money waits for your approval while approval is on.
When the supplier ships, the tracking number goes back to your store, so the customer is notified.
Screenshots show the interface in English.
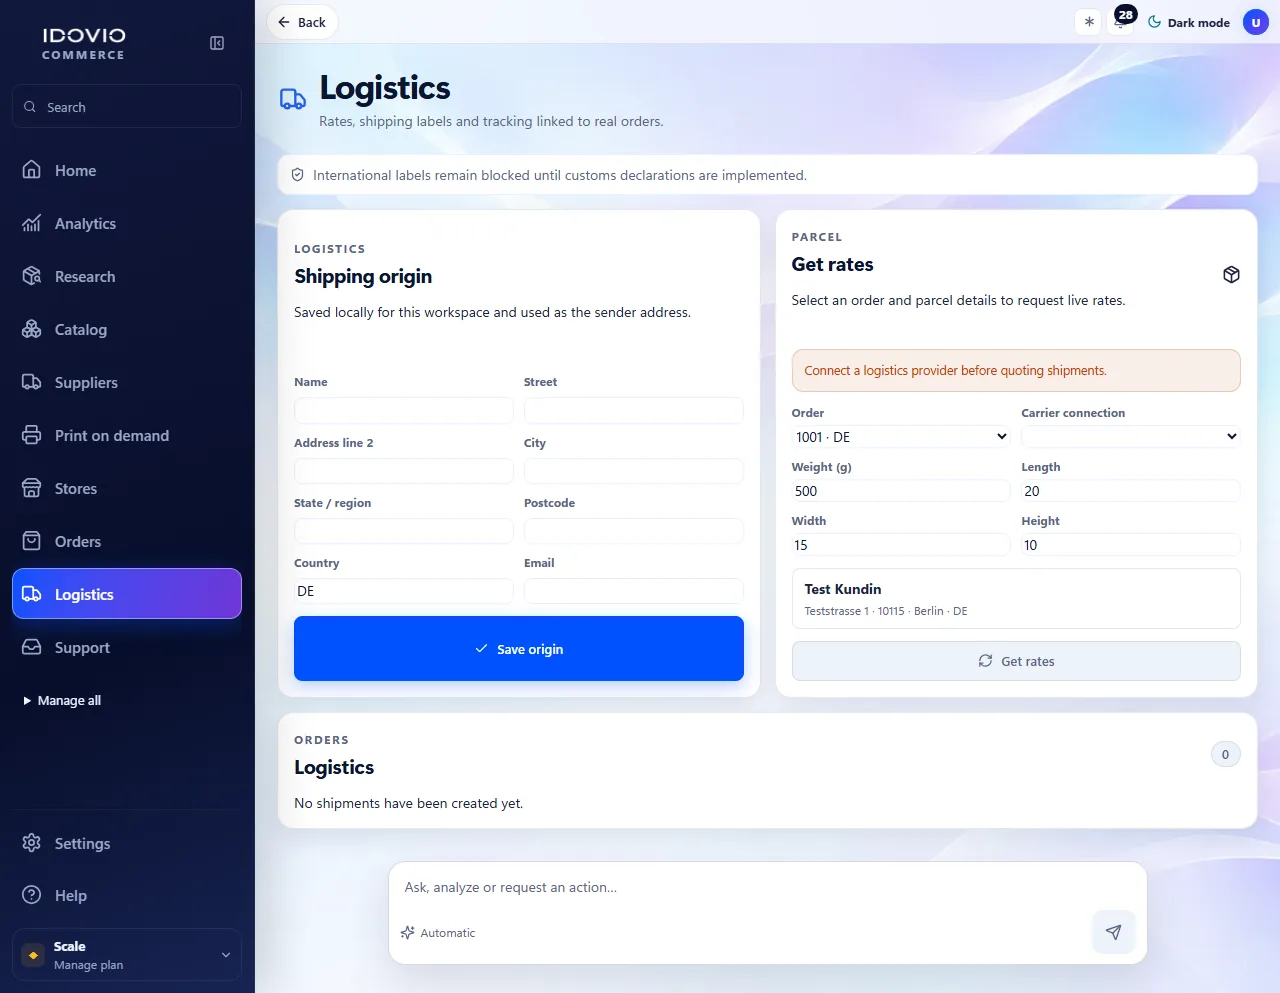
Logistics
Where it isSide menu›Logistics
What it is forOrders arrive from your connected stores on every sync. Each one is tied to its product and to the supplier that fulfils it.
How to do it
Open Orders and choose the order. You see its product, supplier, cost and margin.
Send it to the supplier. Anything that spends money waits for your approval while approval is on.
When the supplier ships, the tracking number goes back to your store, so the customer is notified.
Screenshots show the interface in English.
Support
Where it isSide menu›Support
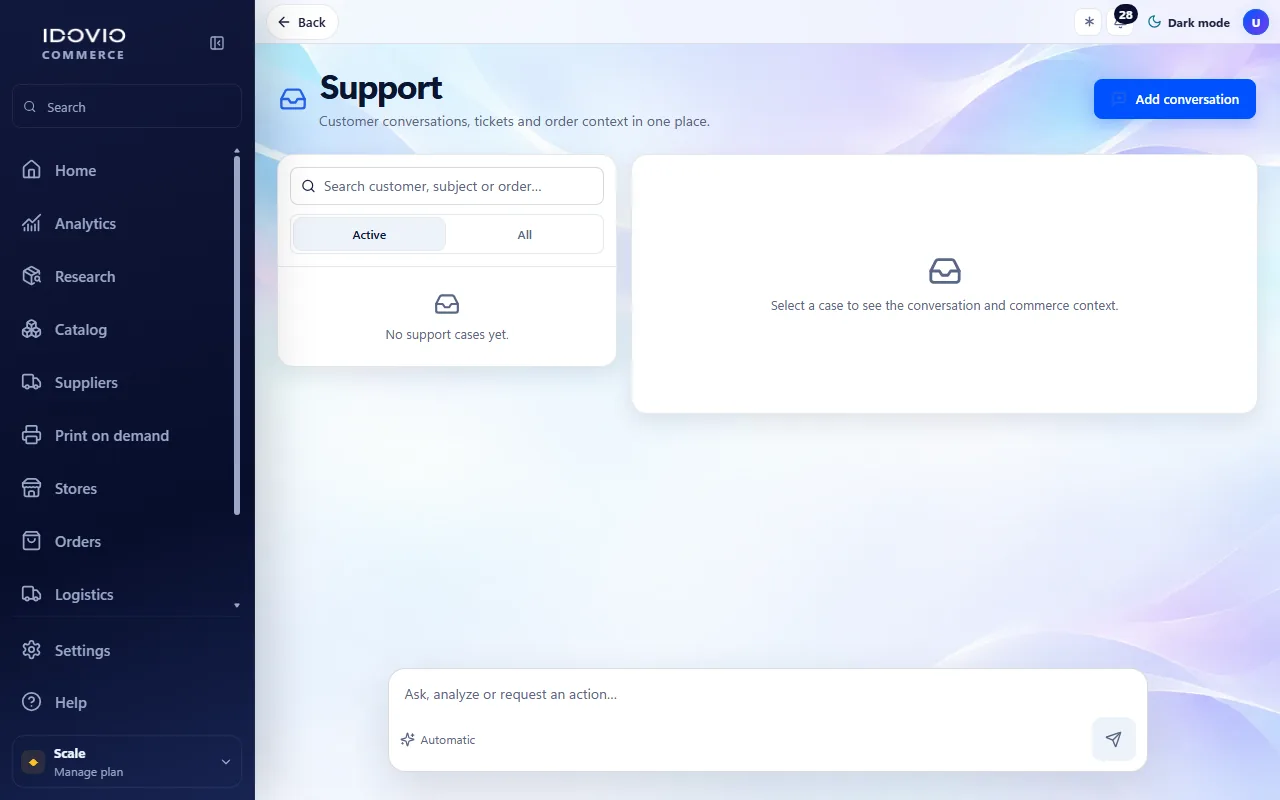
What it is forCustomer conversations, tickets and order context in one place.
Screenshots show the interface in English.
Exceptions
Where it isSide menu›Exceptions
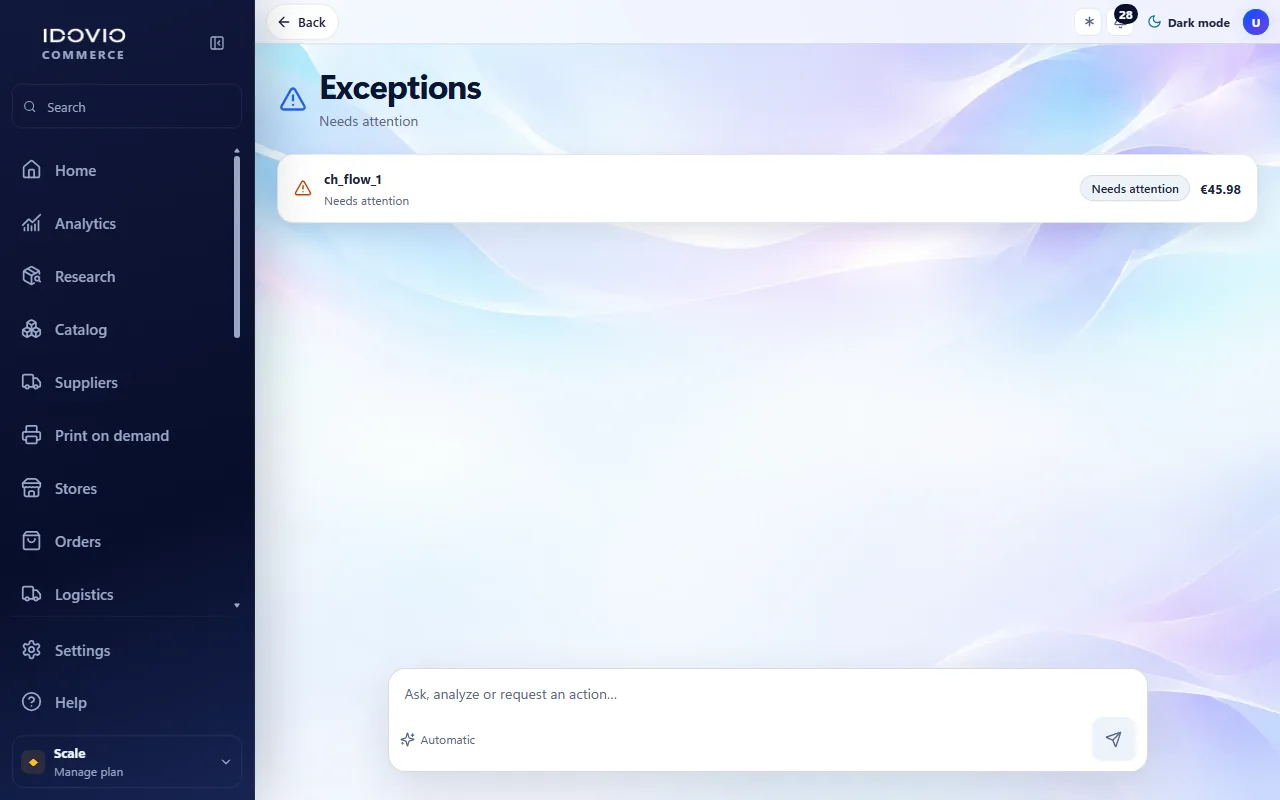
What it is forOrders arrive from your connected stores on every sync. Each one is tied to its product and to the supplier that fulfils it.
How to do it
Open Orders and choose the order. You see its product, supplier, cost and margin.
Send it to the supplier. Anything that spends money waits for your approval while approval is on.
When the supplier ships, the tracking number goes back to your store, so the customer is notified.
Screenshots show the interface in English.
Returns
Where it isSide menu›Returns
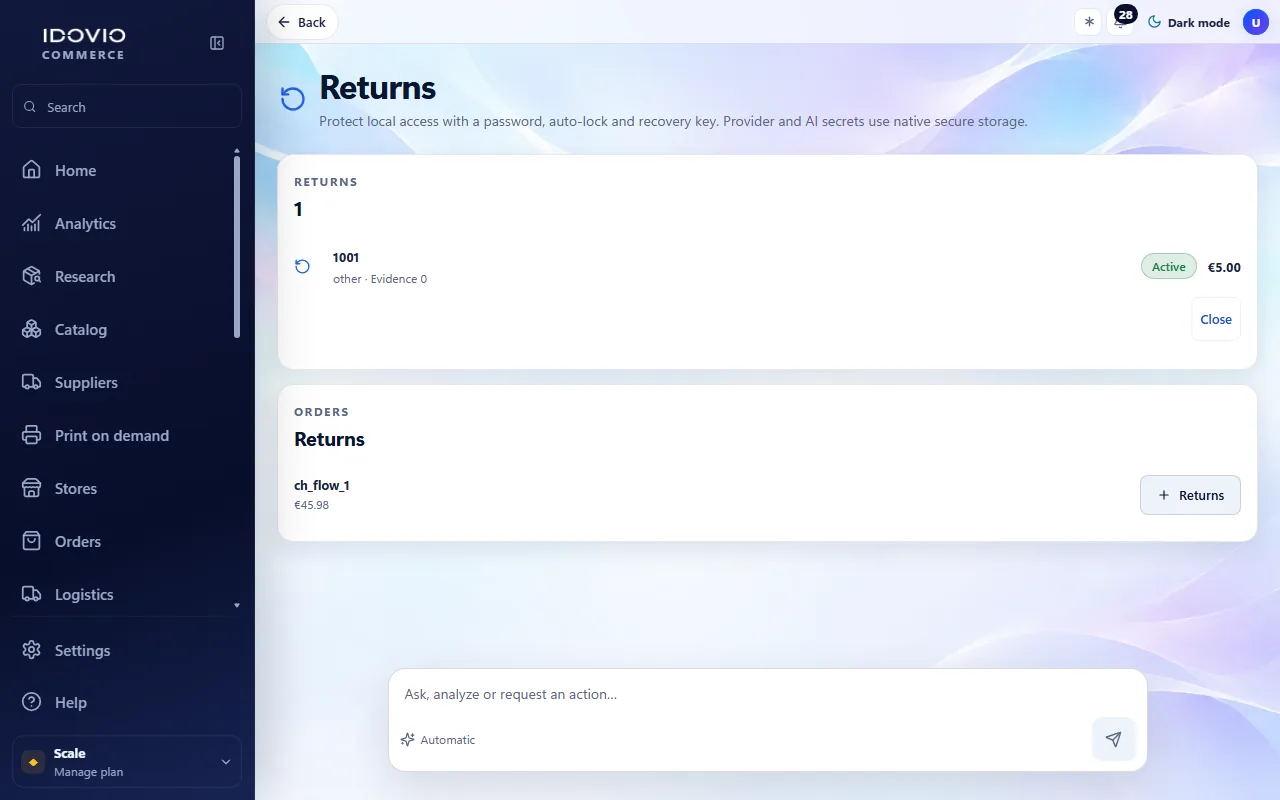
What it is forA refund to a customer is never issued on its own: it always needs your approval.
How to do it
Open Returns and review the request: the order, the reason and the amount.
Press “Approve” to accept it. The refund is issued through the store where the order was placed.
Where the supplier connection allows it, you can also ask the supplier for its part of the refund.
Screenshots show the interface in English.
Profit
Where it isSide menu›Profit
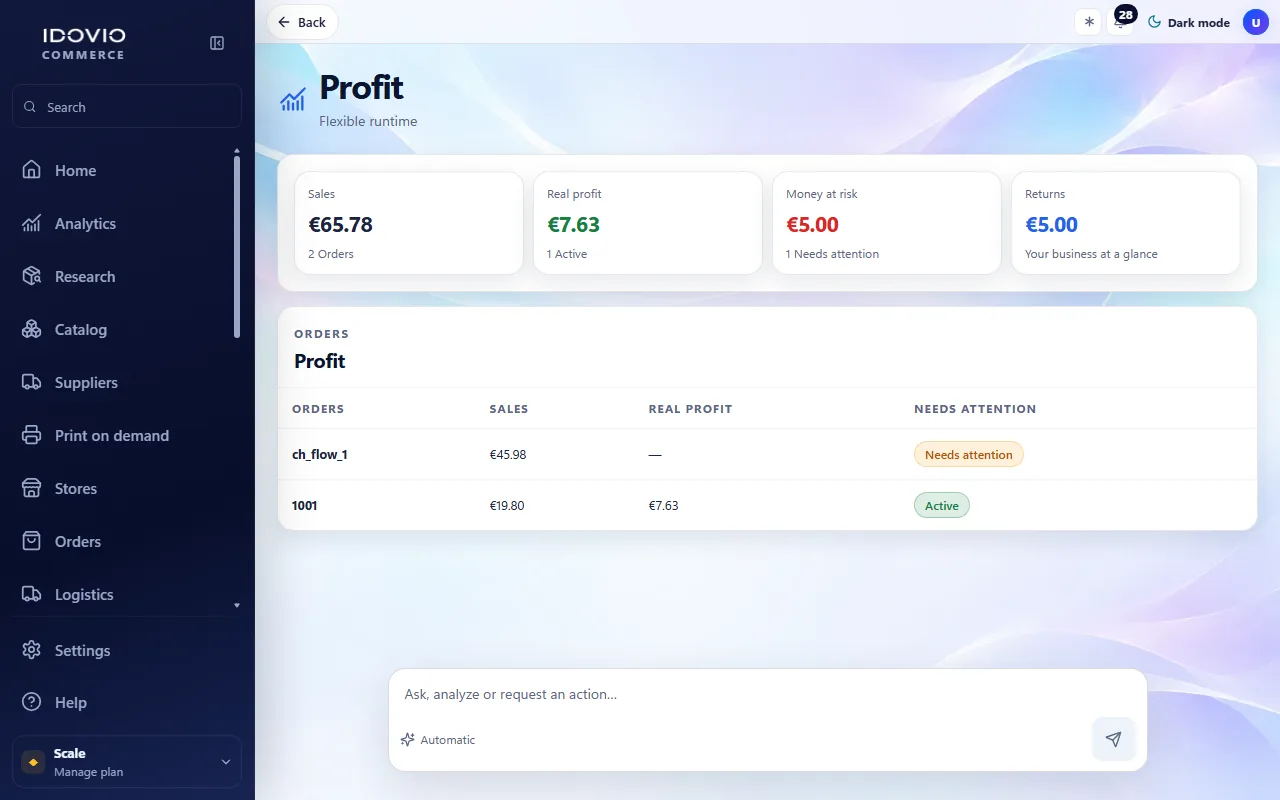
What it is forEvery publication and every price change is checked against your minimum margin, using the real product and shipping costs.
How to do it
Set your “Minimum contribution margin”.
From then on, a listing or a price change below that margin is blocked, and you are told why.
Open Profit to see the margin of each product and each order.
Screenshots show the interface in English.
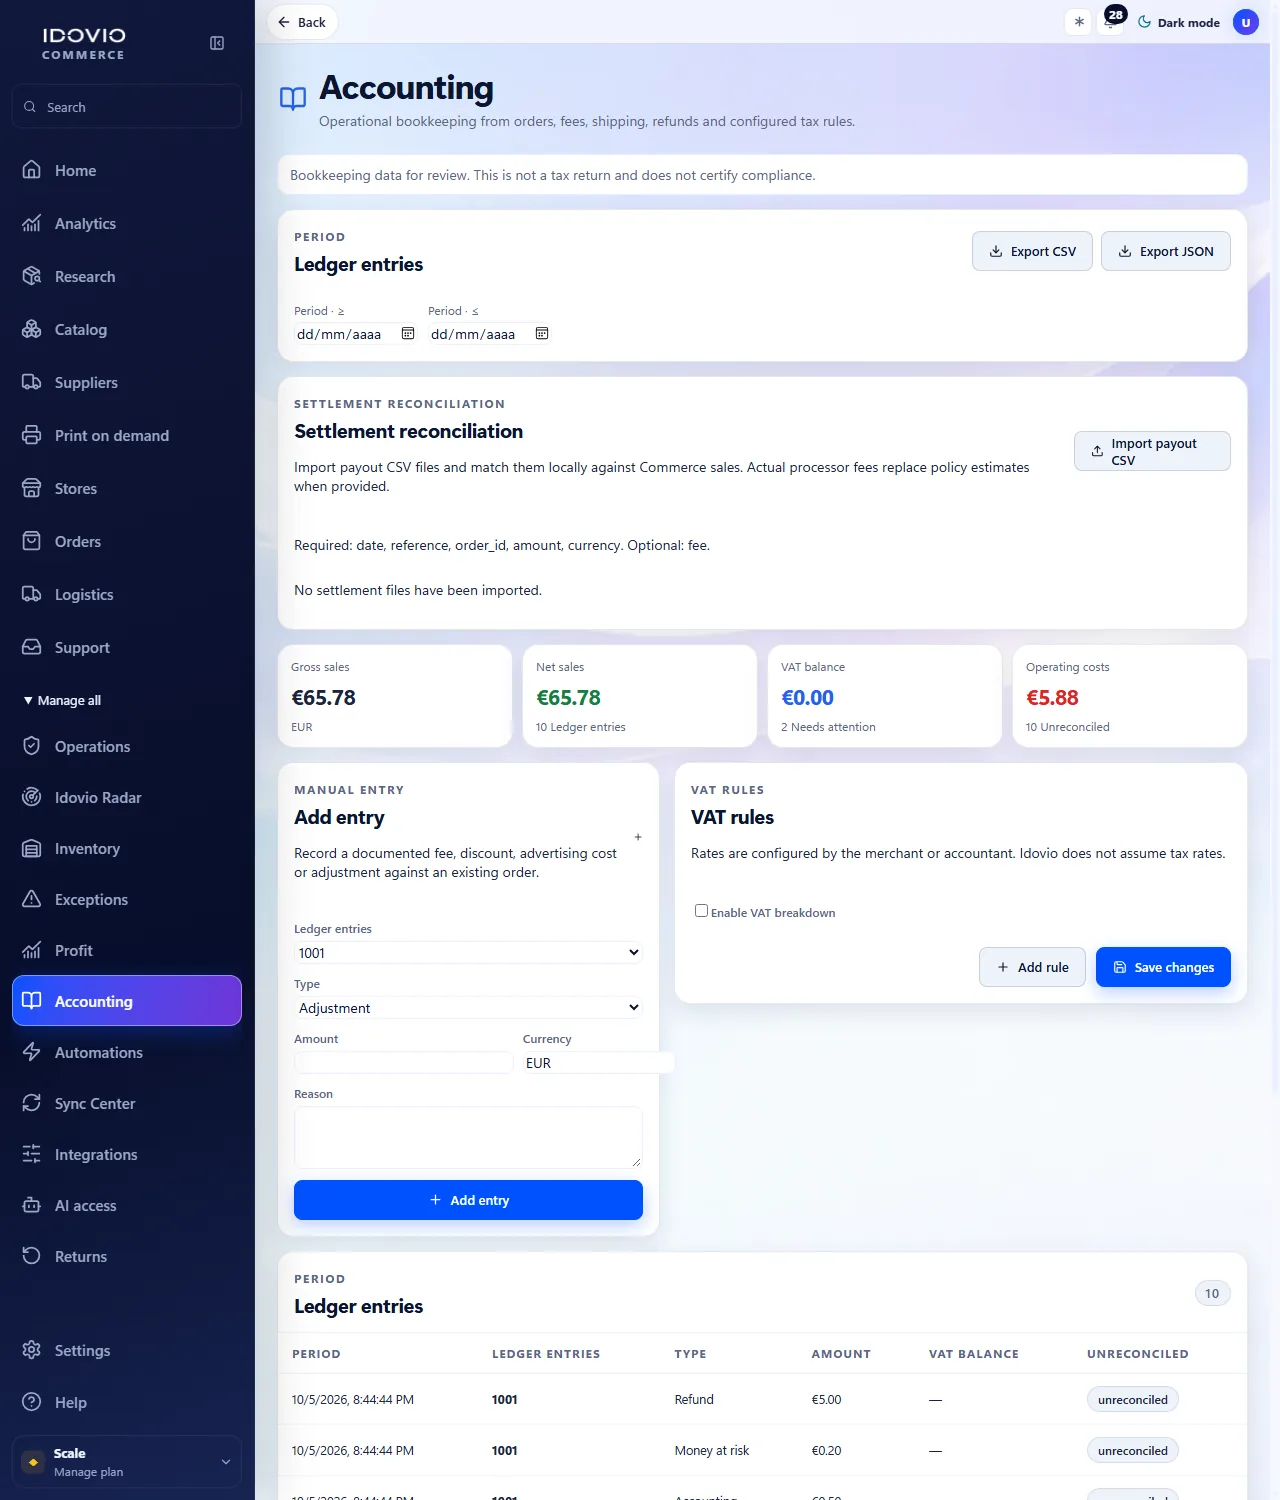
Accounting
Where it isSide menu›Accounting
What it is forEvery publication and every price change is checked against your minimum margin, using the real product and shipping costs.
How to do it
Set your “Minimum contribution margin”.
From then on, a listing or a price change below that margin is blocked, and you are told why.
Open Profit to see the margin of each product and each order.
Screenshots show the interface in English.
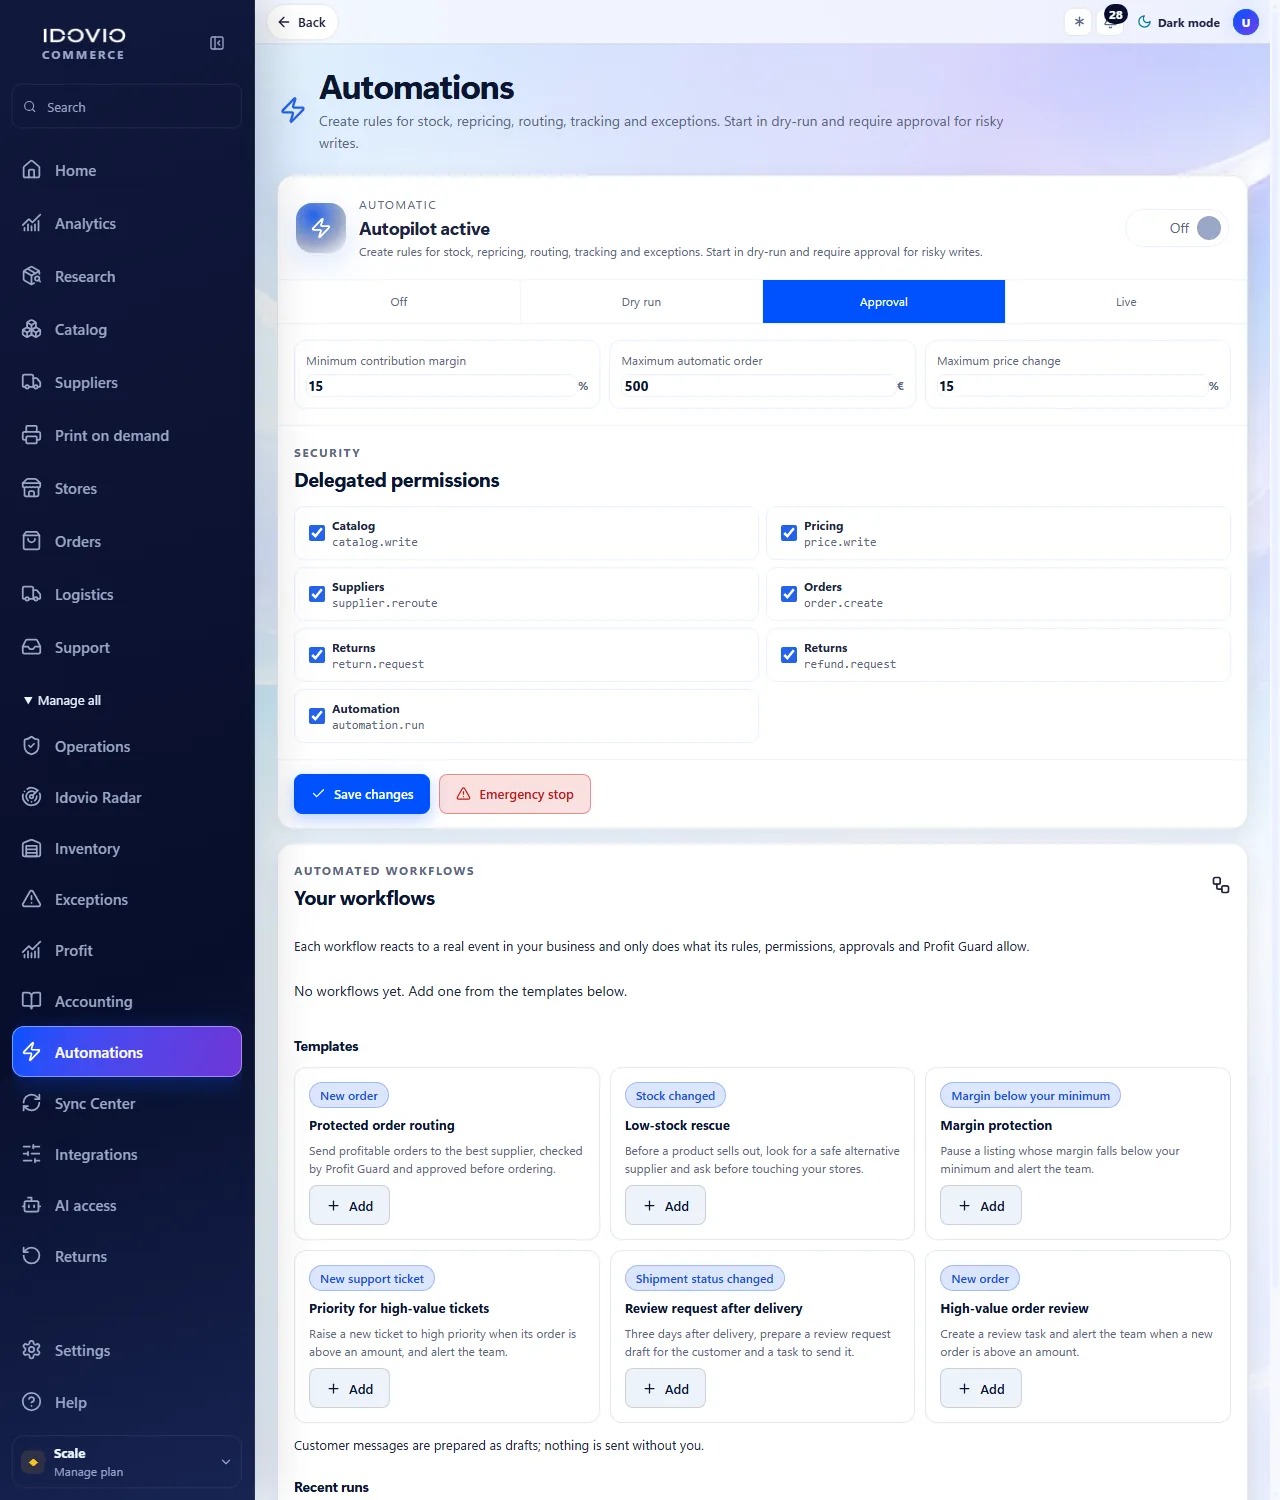
Automations
Where it isSide menu›Automations
What it is forAutomations do the repetitive work by rules, with no need for AI. You decide how much they may do on their own.
How to do it
Open Automations and choose what to automate: stock, prices, routing, tracking or exceptions.
Start in “Dry run”: you see what would happen and nothing is changed.
Then use “Approval”: each action waits for you to press “Approve” until you trust the rule.
Screenshots show the interface in English.
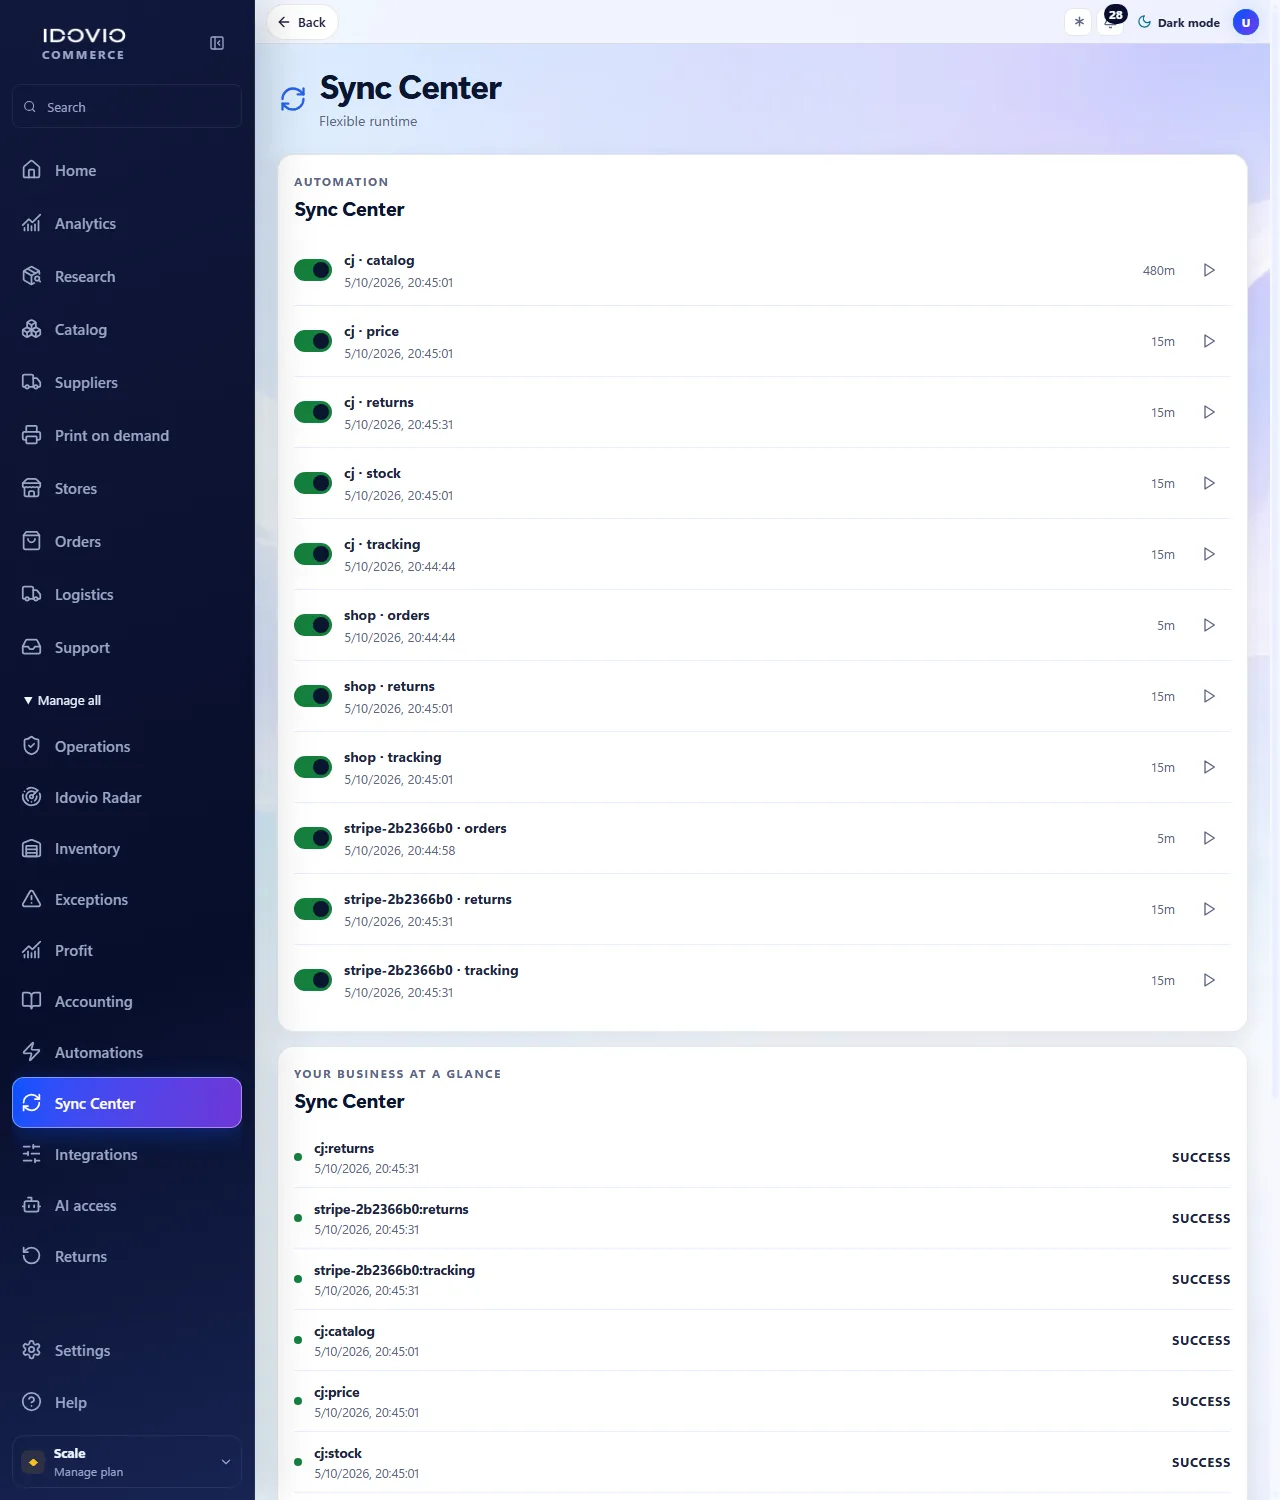
Sync Center
Where it isSide menu›Sync Center
What it is forStores, suppliers and stock are fetched on a schedule every few minutes. You can also ask for it at any moment.
How to do it
Open Sync Center to see when each connection was last updated.
To fetch changes right now, press “Sync now” on the connection's card in Integration Hub.
A connection that fails is marked with the reason, so you know what to fix.
Screenshots show the interface in English.
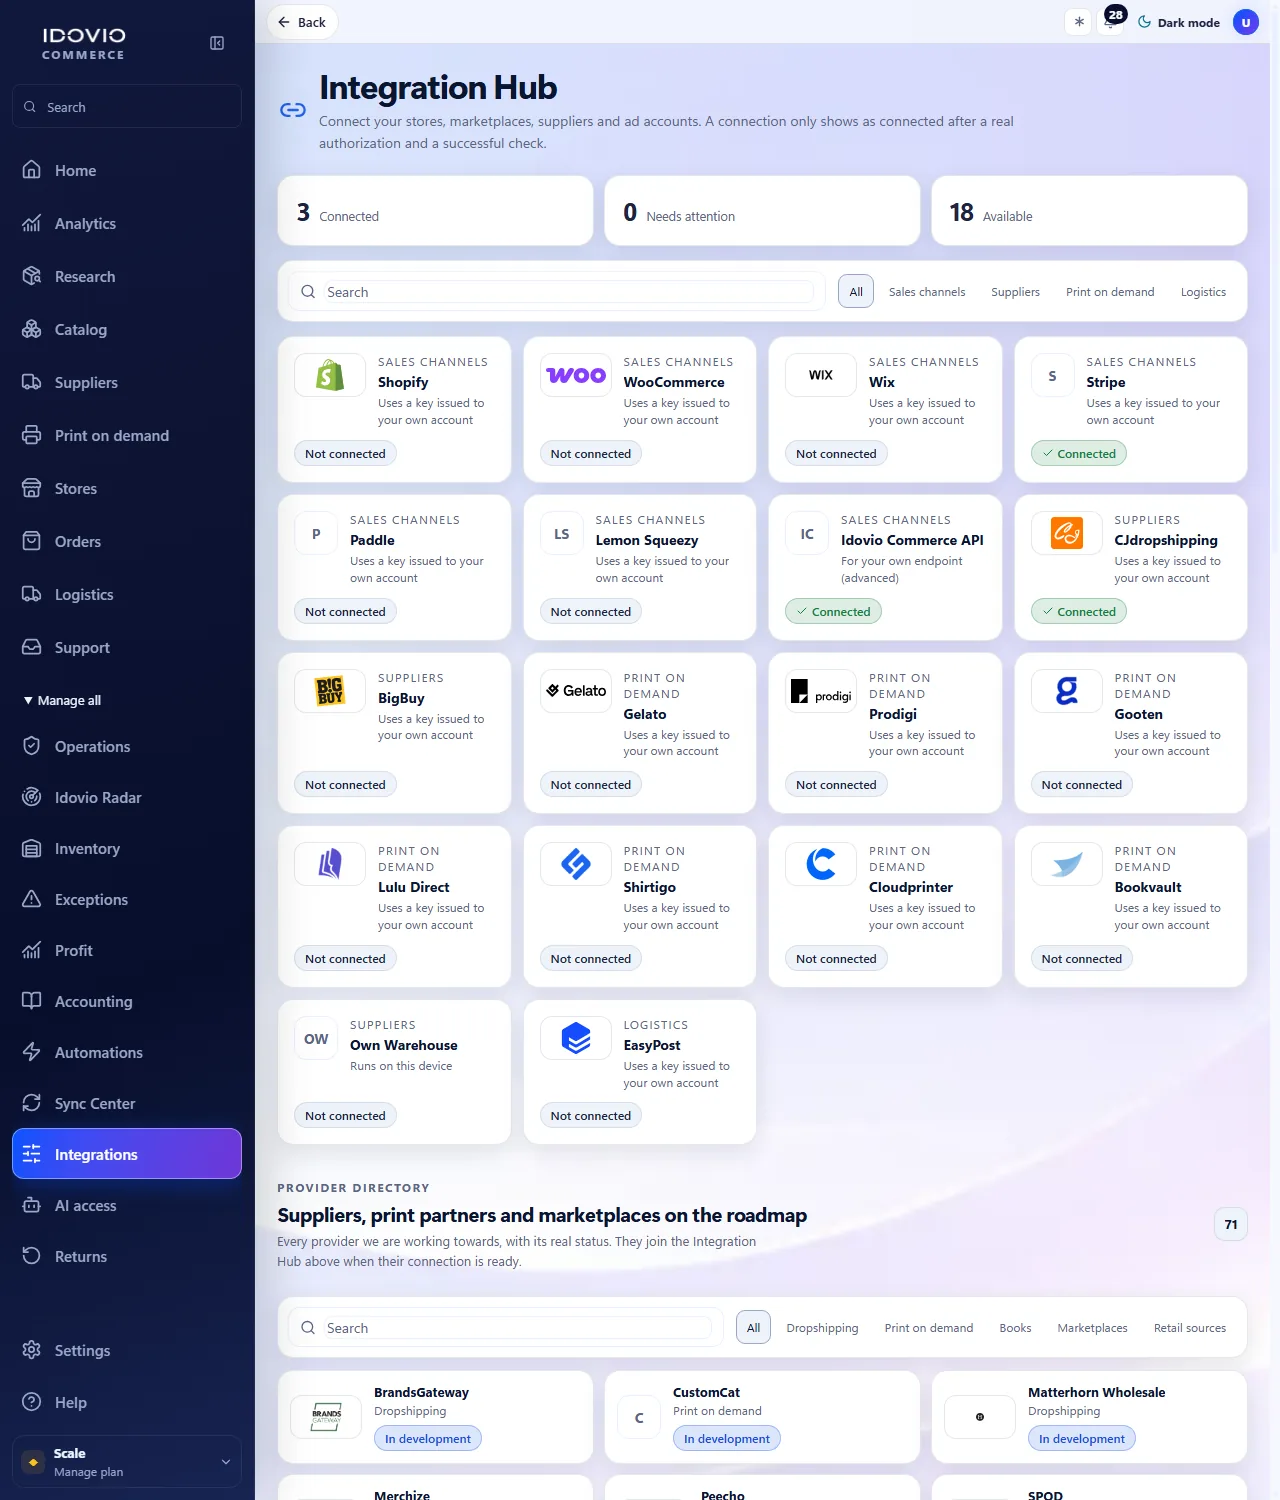
Integrations
Where it isSide menu›Integrations
What it is forEverything you connect lives in one place. A connection only shows as connected after a real check against your account.
How to do it
Open Integration Hub, search for your store or marketplace and open its card.
Press “Connect”. If the provider offers sign-in, you approve access on its own page; if it works with a key, paste the key from your own account. Only the minimum data is asked.
When the card shows “Connected”, press “Sync now” to bring in your products and orders. If it shows “Reauthorization required”, press “Reconnect”.
Screenshots show the interface in English.
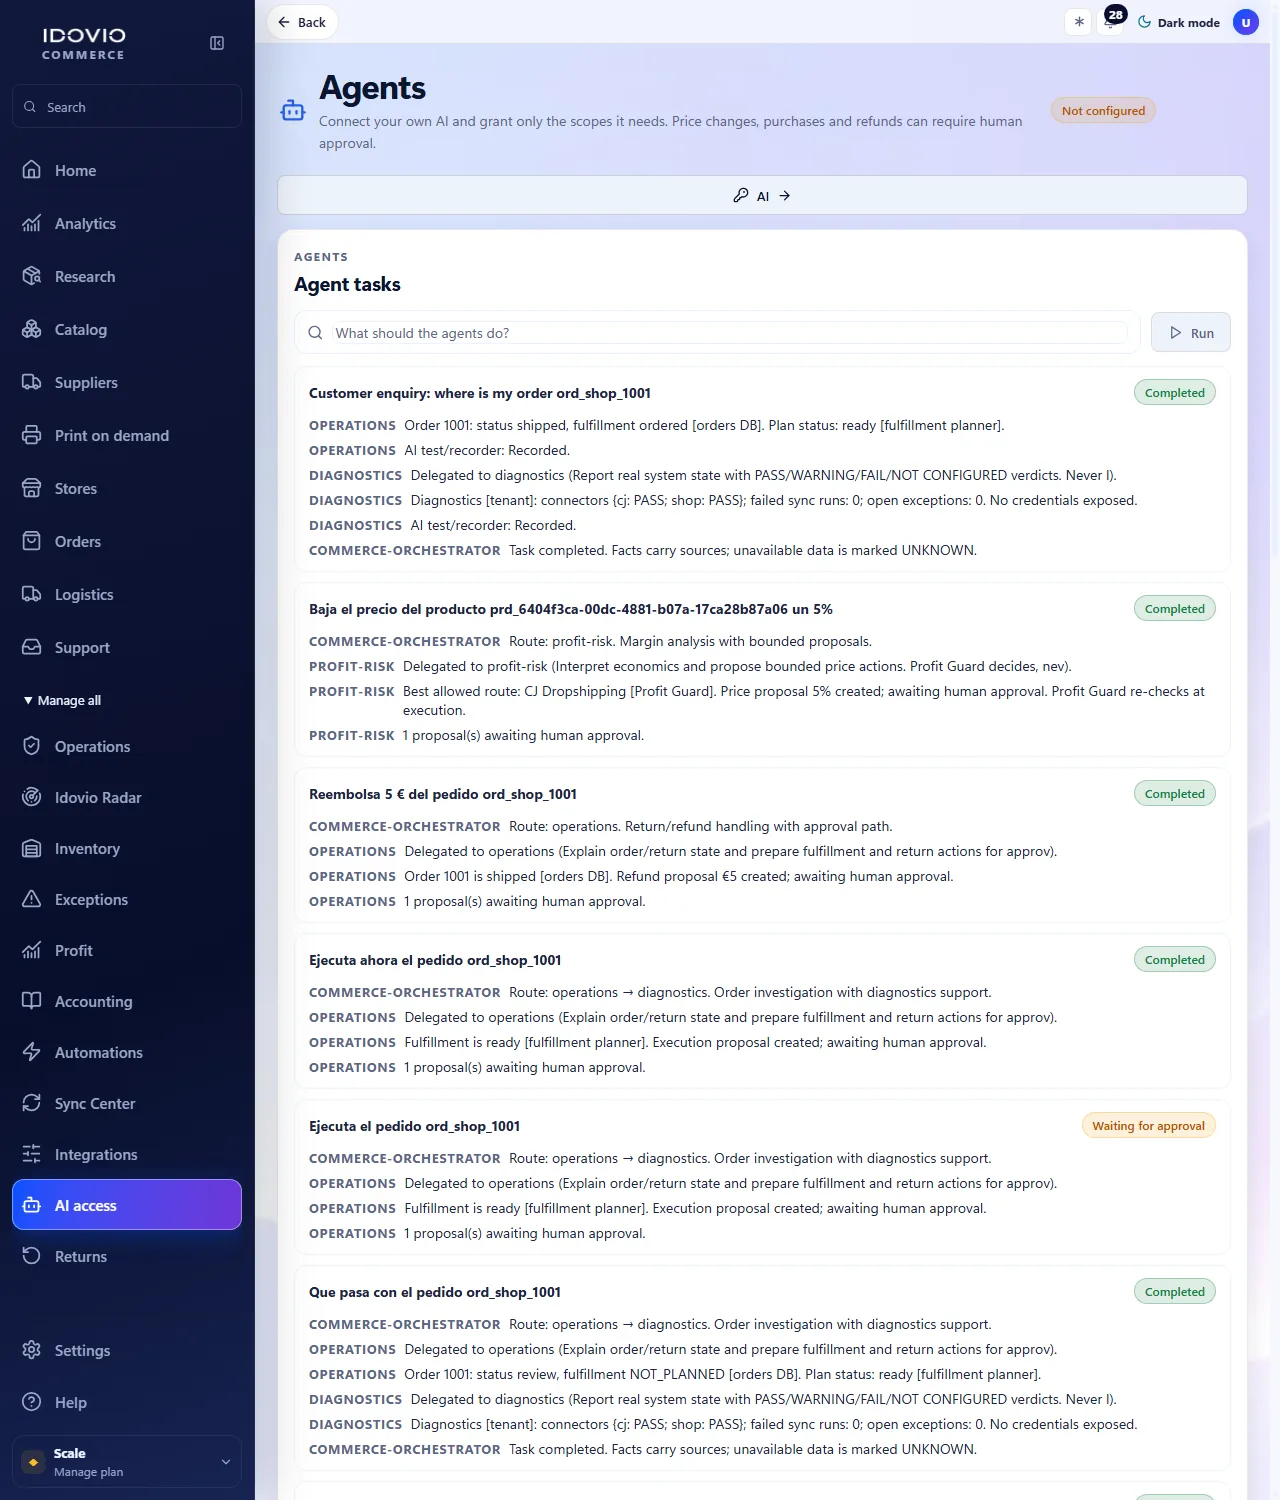
AI access
Where it isSide menu›AI access
What it is forThe app works by rules without AI. AI is an extra that you can add with your own provider or run on your own computer.
How to do it
Open AI access and choose a provider, or “Local AI” to keep everything on your device.
Give it only the permissions it needs.
Price changes, purchases and refunds proposed by AI still wait for your approval.
Screenshots show the interface in English.
Settings
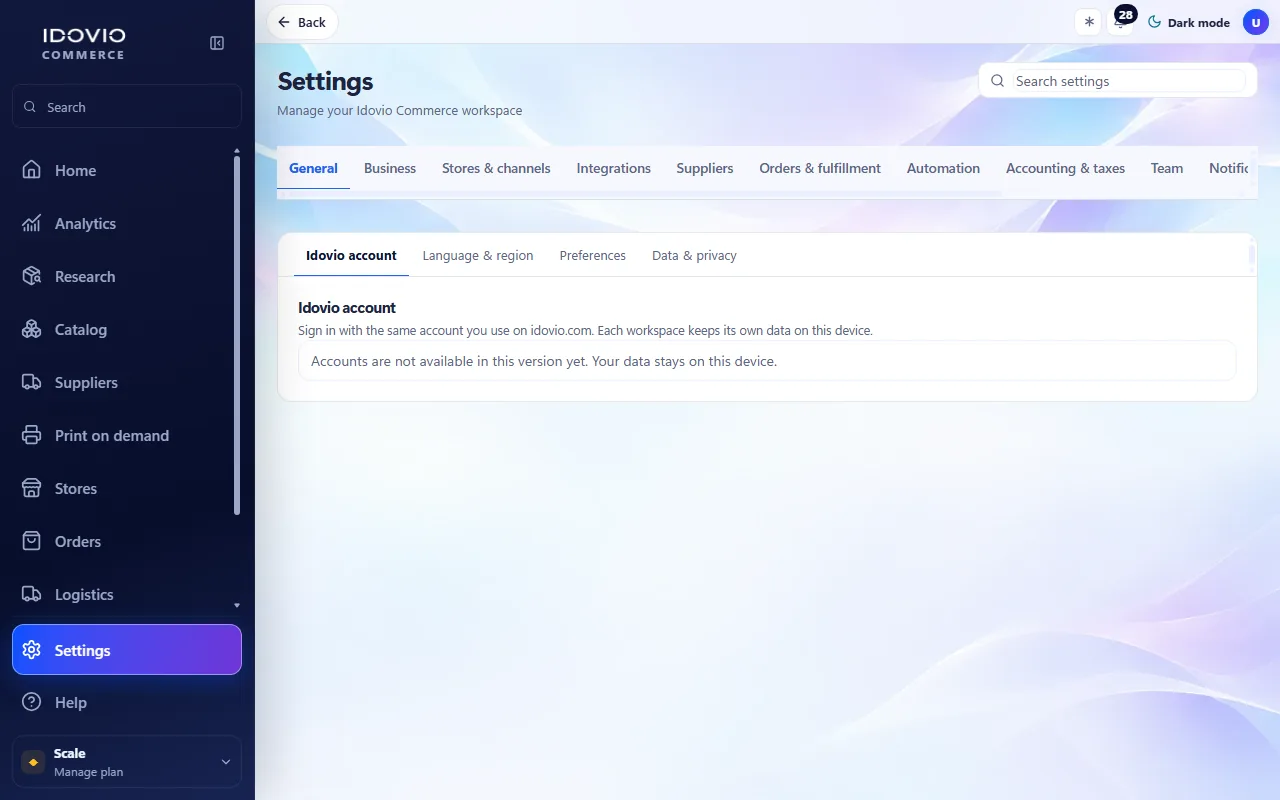
General · Idovio account
Where it isSettings›General›Idovio account/settings/general/workspace
Settings on this page
Signed in as
Your workspace data on this device belongs only to this account and workspace.
Workspace
Sign out
Also remove this workspace's data from this device
Two-step verification
Off. Owners, admins and anyone who connects stores or seller accounts must turn it on.
Screenshots show the interface in English.
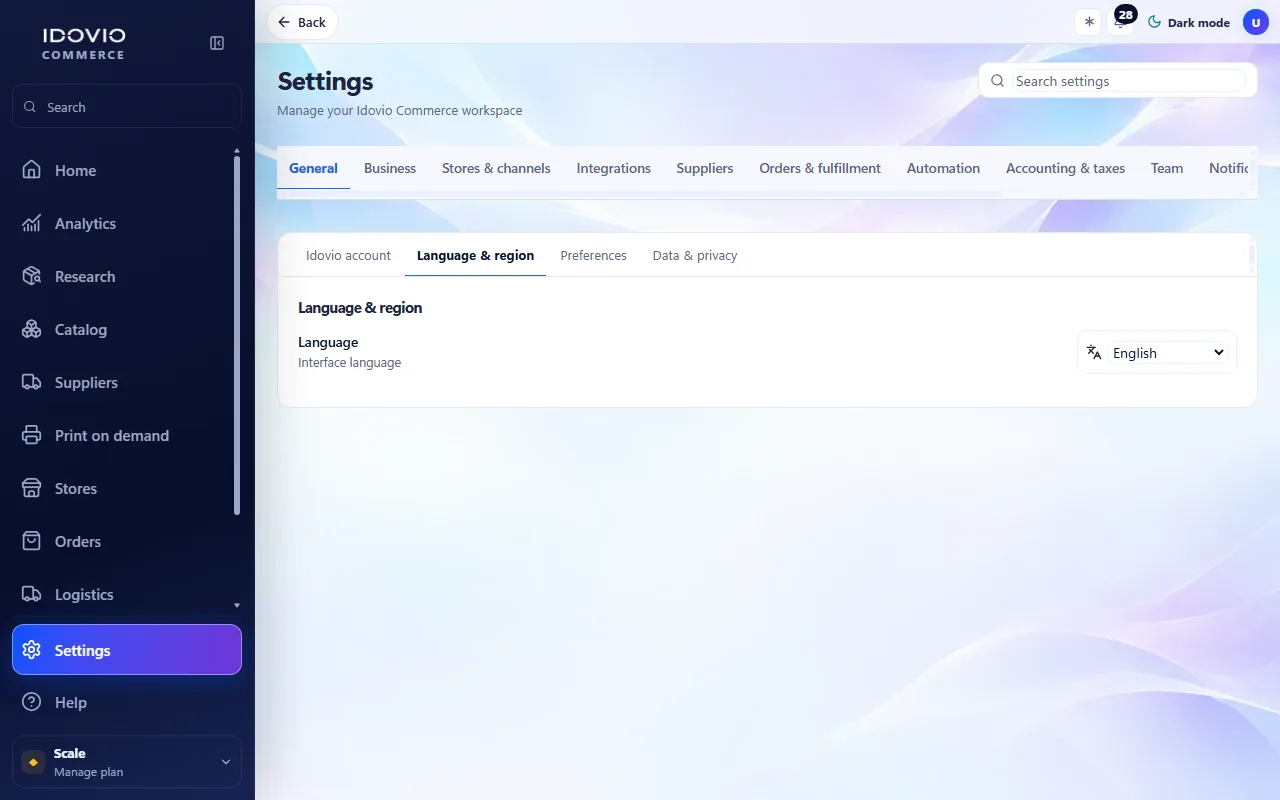
General · Language & region
Where it isSettings›General›Language & region/settings/general/localization
Settings on this page
Language
Interface language
Screenshots show the interface in English.
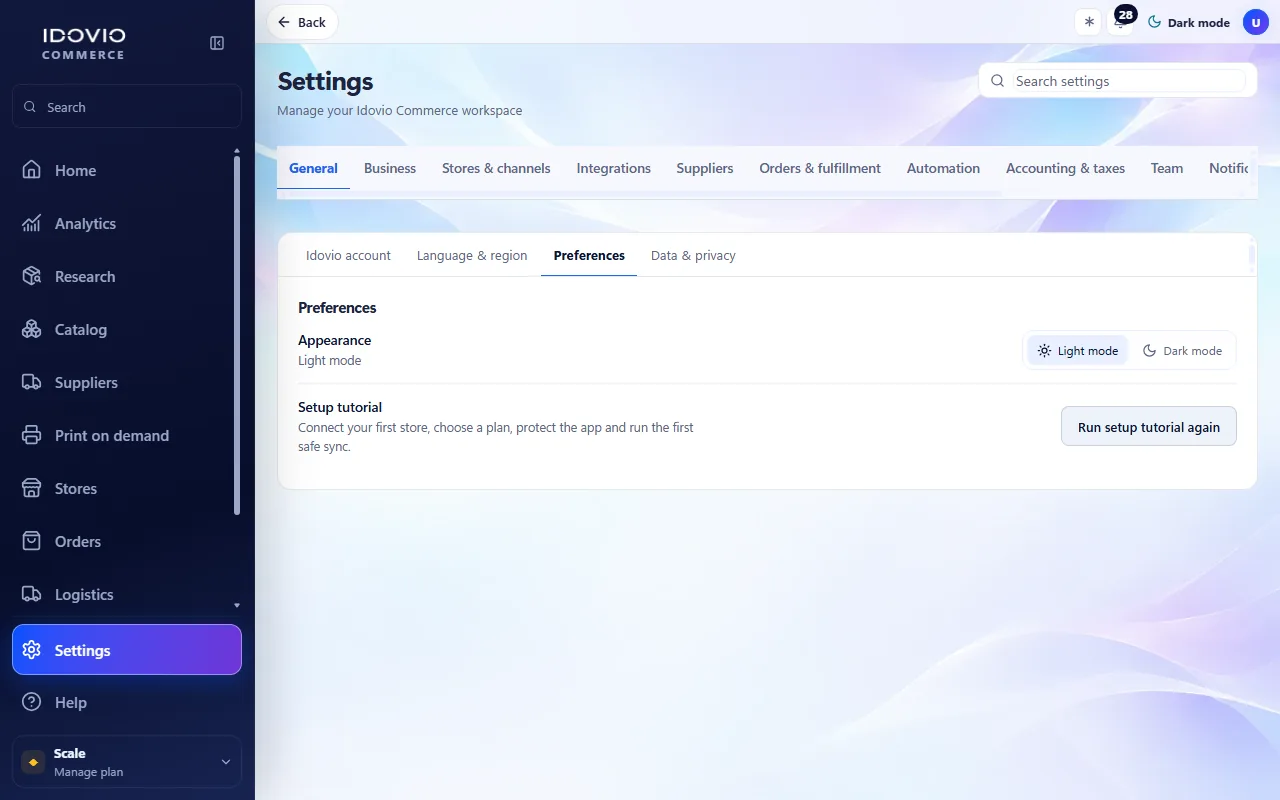
General · Preferences
Where it isSettings›General›Preferences/settings/general/preferences
Settings on this page
Appearance
Setup tutorial
Connect your first store, choose a plan, protect the app and run the first safe sync.
Screenshots show the interface in English.
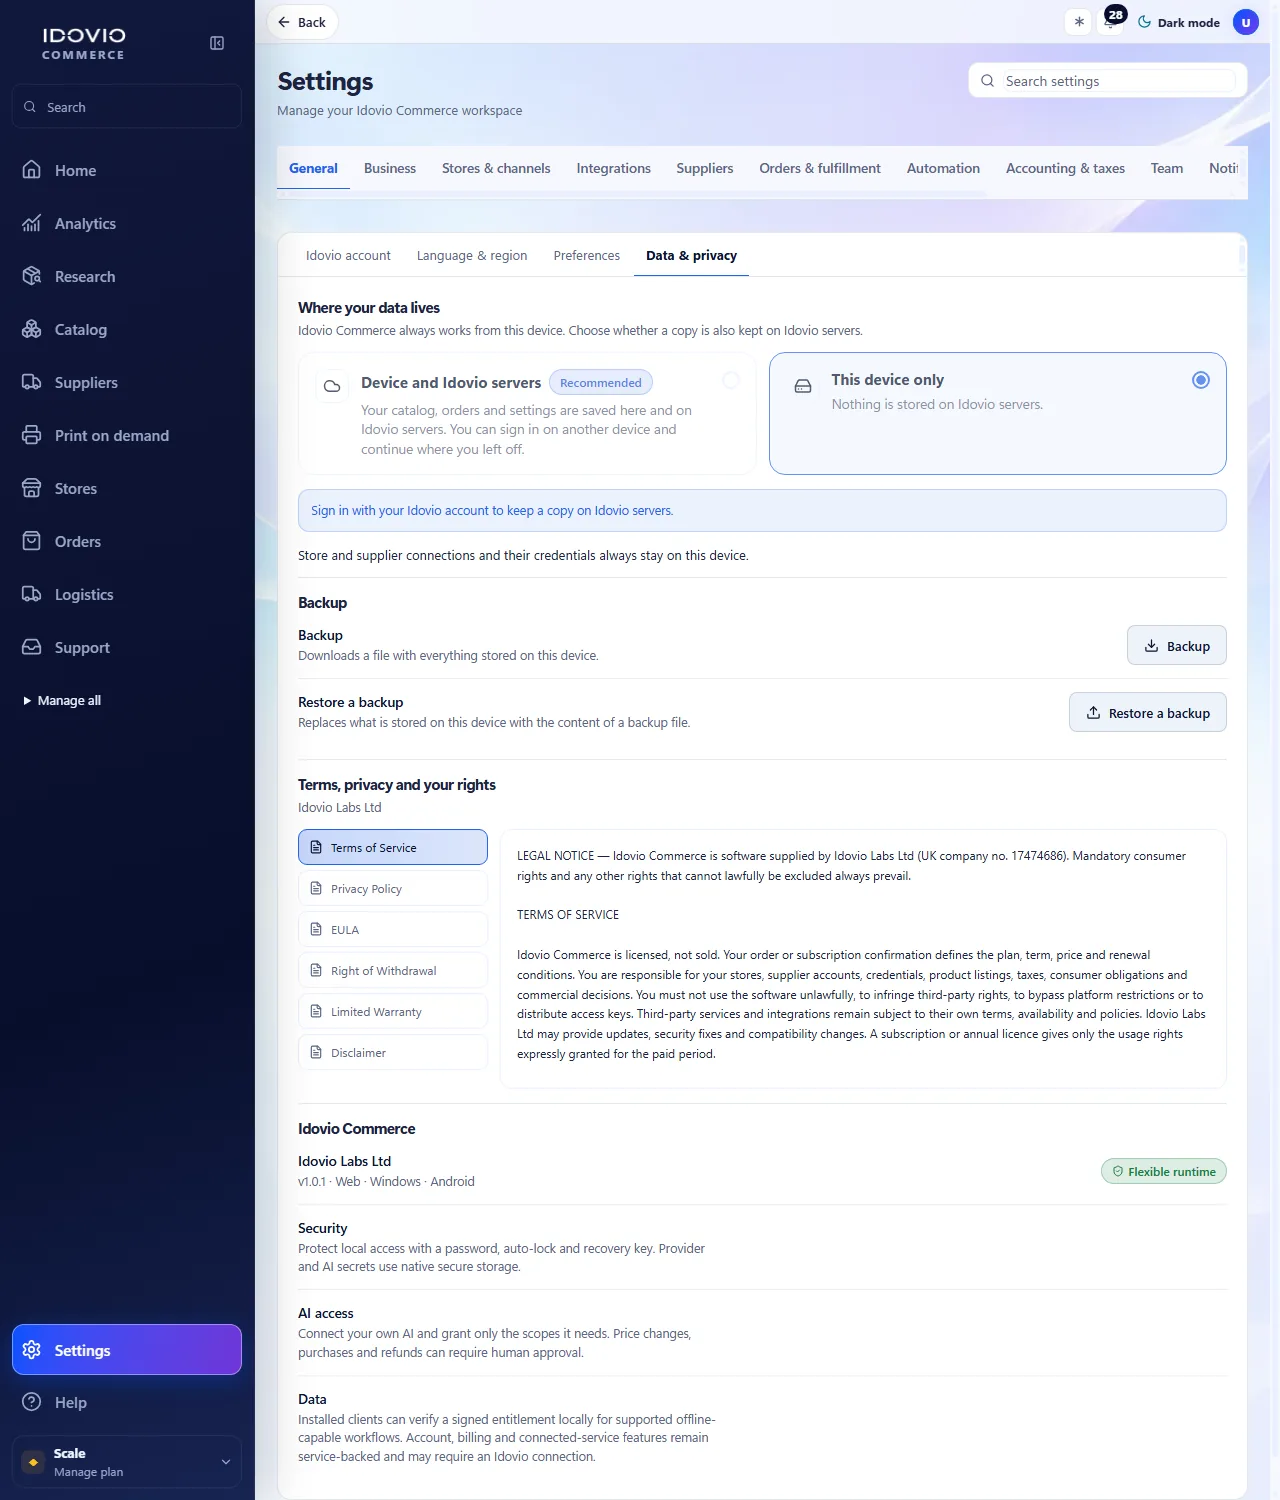
General · Data & privacy
Where it isSettings›General›Data & privacy/settings/general/data
Settings on this page
Where your data lives
Idovio Commerce always works from this device. Choose whether a copy is also kept on Idovio servers.
Device and Idovio servers
Your catalog, orders and settings are saved here and on Idovio servers. You can sign in on another device and continue where you left off.
This device only
Nothing is stored on Idovio servers.
Backup
Downloads a file with everything stored on this device.
Restore a backup
Replaces what is stored on this device with the content of a backup file.
Terms, privacy and your rights
Screenshots show the interface in English.
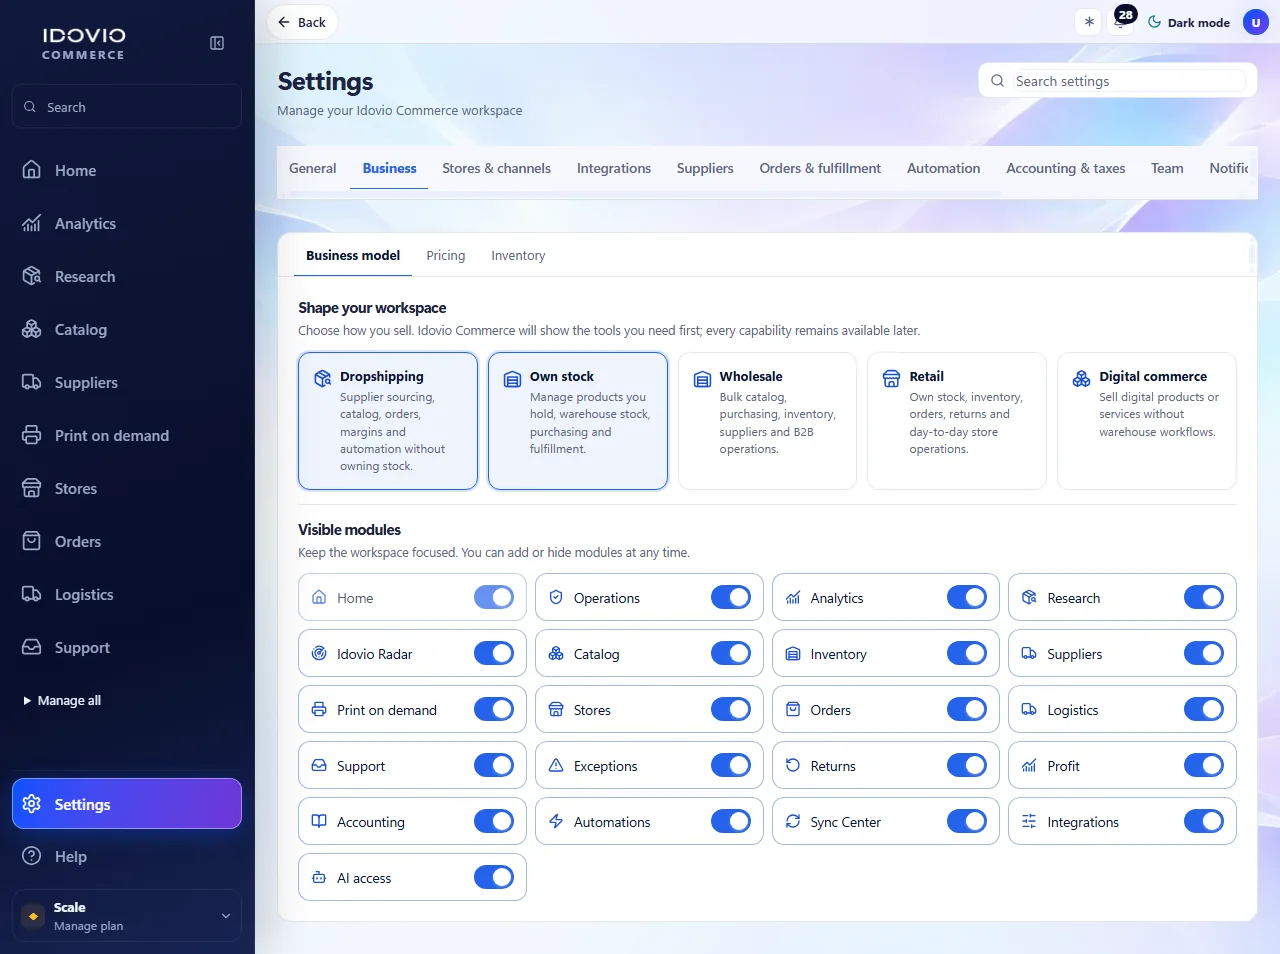
Business · Business model
Where it isSettings›Business›Business model/settings/business/model
Settings on this page
Shape your workspace
Choose how you sell. Idovio Commerce will show the tools you need first; every capability remains available later.
Visible modules
Keep the workspace focused. You can add or hide modules at any time.
Screenshots show the interface in English.
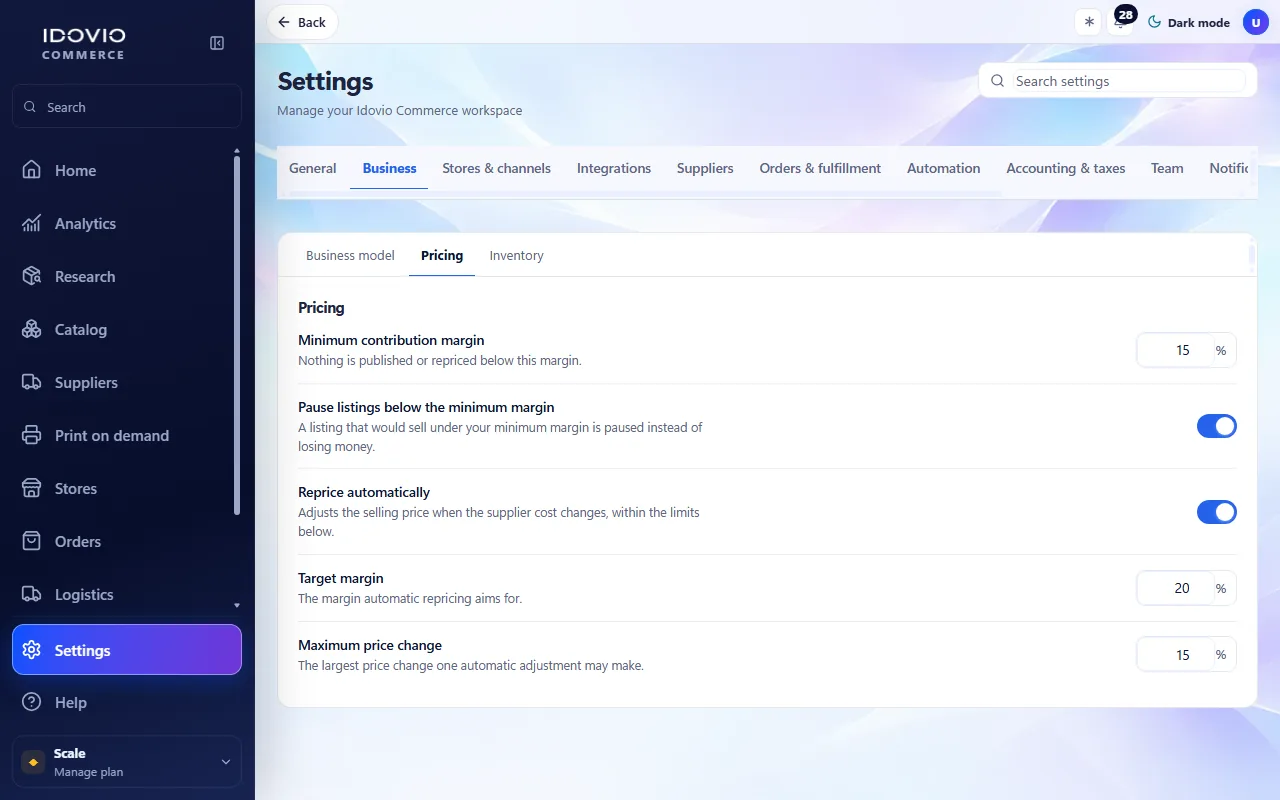
Business · Pricing
Where it isSettings›Business›Pricing/settings/business/pricing
Settings on this page
Minimum contribution margin
Nothing is published or repriced below this margin.
Pause listings below the minimum margin
A listing that would sell under your minimum margin is paused instead of losing money.
Reprice automatically
Adjusts the selling price when the supplier cost changes, within the limits below.
Target margin
The margin automatic repricing aims for.
Maximum price change
The largest price change one automatic adjustment may make.
Screenshots show the interface in English.
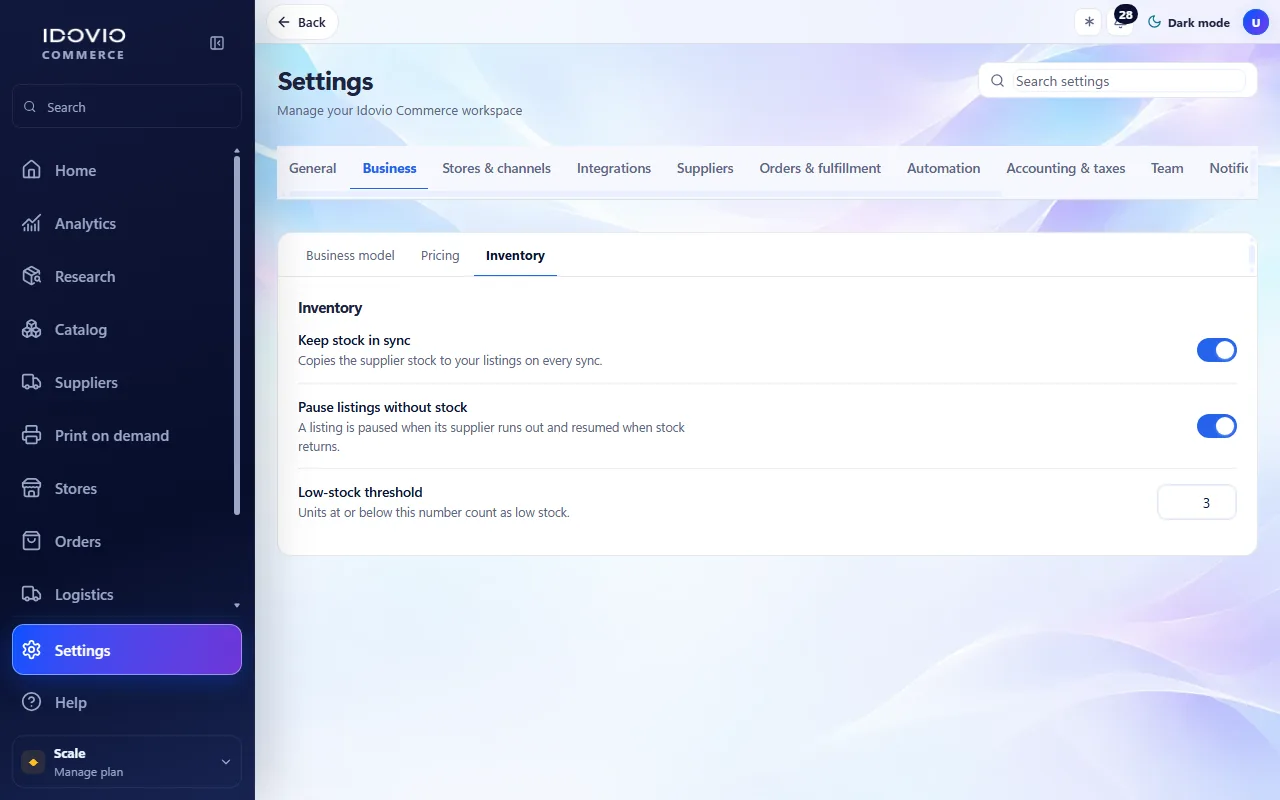
Business · Inventory
Where it isSettings›Business›Inventory/settings/business/inventory
Settings on this page
Keep stock in sync
Copies the supplier stock to your listings on every sync.
Pause listings without stock
A listing is paused when its supplier runs out and resumed when stock returns.
Low-stock threshold
Units at or below this number count as low stock.
Screenshots show the interface in English.
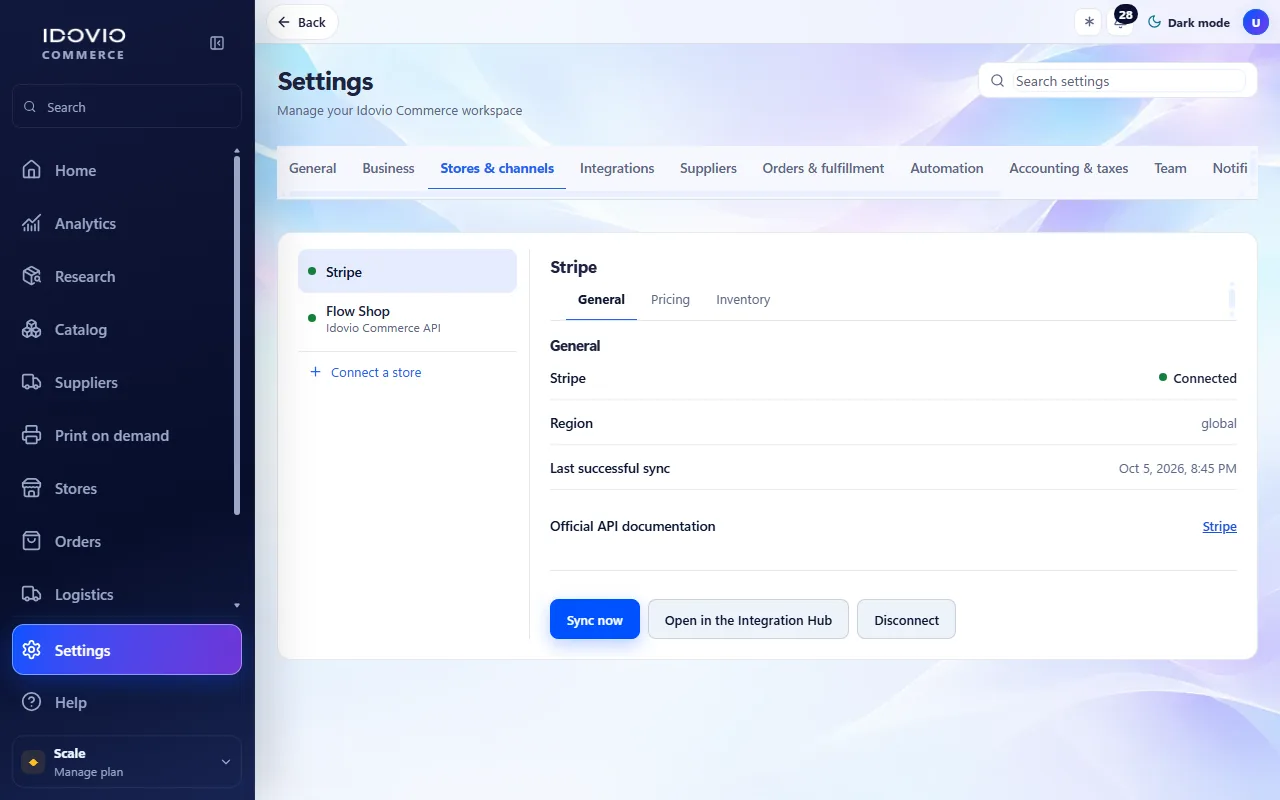
Stores & channels
Where it isSettings›Stores & channels/settings/channels
Choose a connected store or supplier in the list on the left; each one has these pages.
Settings on this page
Own rules
Off: your general rules apply here. On: the rules below apply only here.
Pause listings below the minimum margin
A listing that would sell under your minimum margin is paused instead of losing money.
Reprice automatically
Adjusts the selling price when the supplier cost changes, within the limits below.
Maximum price change
The largest price change one automatic adjustment may make.
Keep stock in sync
Copies the supplier stock to your listings on every sync.
Pause listings without stock
A listing is paused when its supplier runs out and resumed when stock returns.
Sync now
Disconnect
Screenshots show the interface in English.
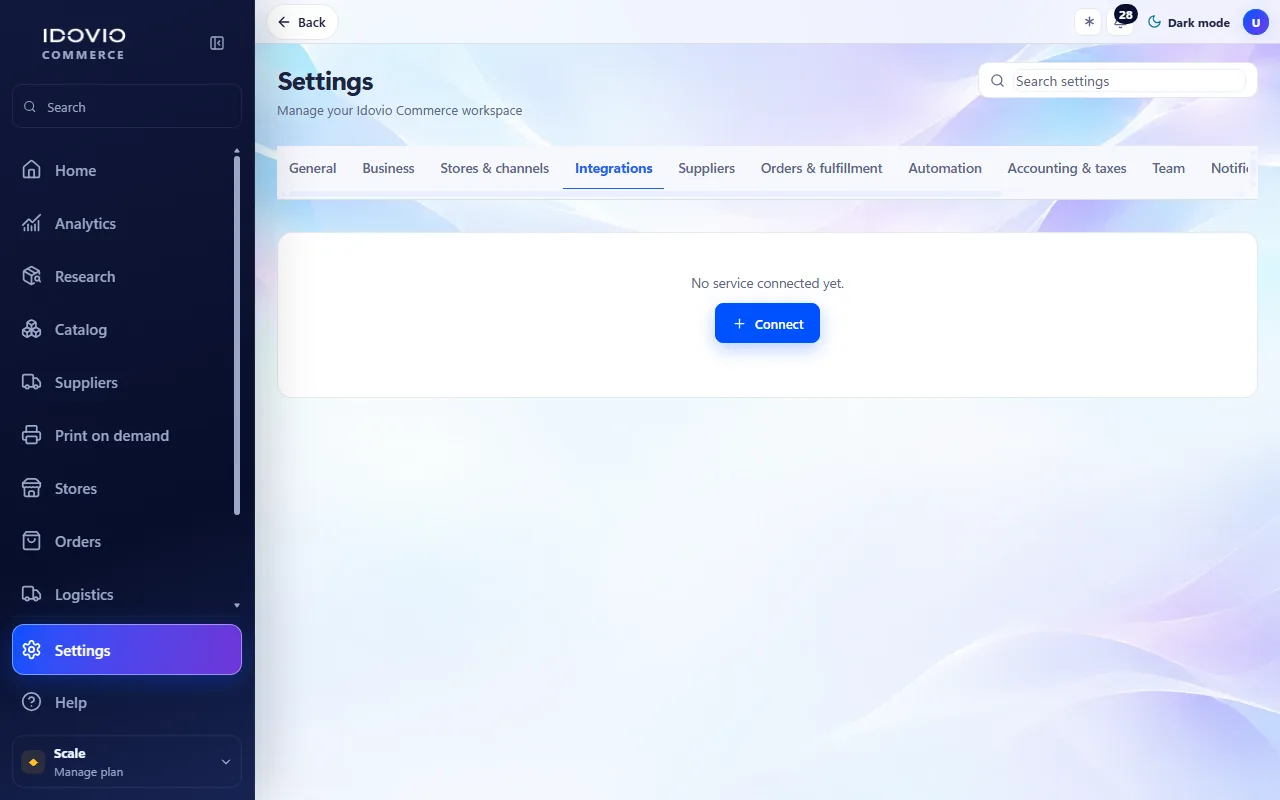
Integrations
Where it isSettings›Integrations/settings/integrations
Settings on this page
Last successful sync
Sync now
Disconnect
Screenshots show the interface in English.
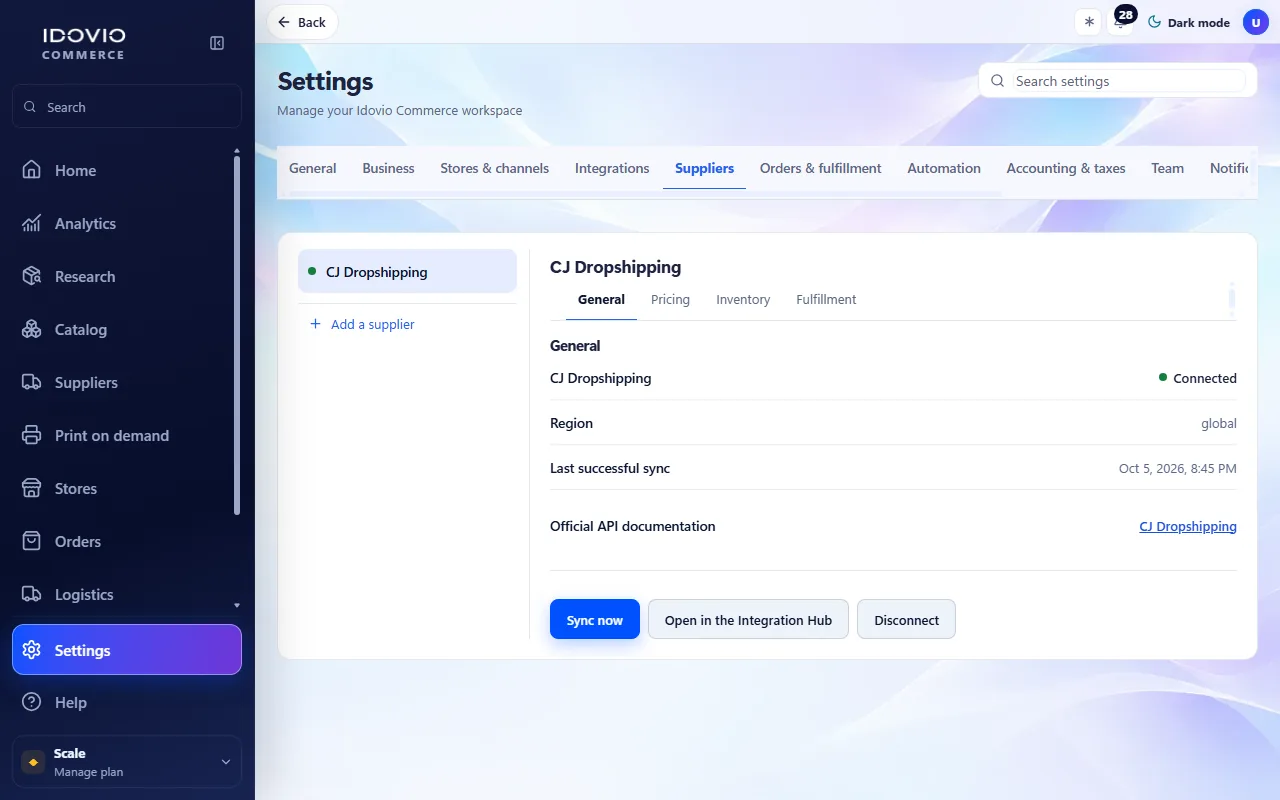
Suppliers
Where it isSettings›Suppliers/settings/suppliers
Choose a connected store or supplier in the list on the left; each one has these pages.
Settings on this page
Own rules
Off: your general rules apply here. On: the rules below apply only here.
Target margin
The margin automatic repricing aims for.
Low-stock threshold
Units at or below this number count as low stock.
Switch supplier when one degrades
Orders go to another connected supplier of the same product when the current one falls below the health floor.
Supplier health floor
Below this score, from 0 to 100, a supplier counts as degraded.
Sync now
Disconnect
Screenshots show the interface in English.
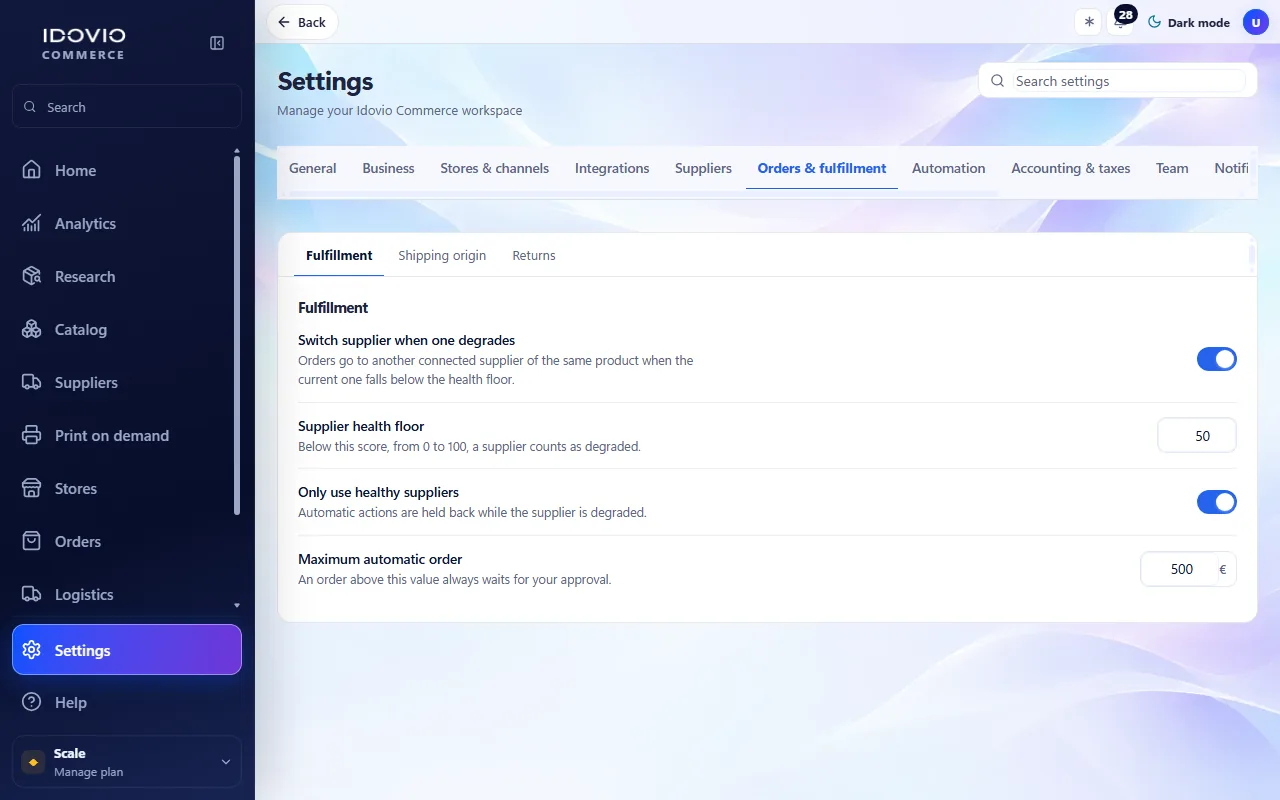
Orders & fulfillment · Fulfillment
Where it isSettings›Orders & fulfillment›Fulfillment/settings/orders/fulfillment
Settings on this page
Switch supplier when one degrades
Orders go to another connected supplier of the same product when the current one falls below the health floor.
Supplier health floor
Below this score, from 0 to 100, a supplier counts as degraded.
Only use healthy suppliers
Automatic actions are held back while the supplier is degraded.
Maximum automatic order
An order above this value always waits for your approval.
Screenshots show the interface in English.
Orders & fulfillment · Shipping origin
Where it isSettings›Orders & fulfillment›Shipping origin/settings/orders/shipping
Settings on this page
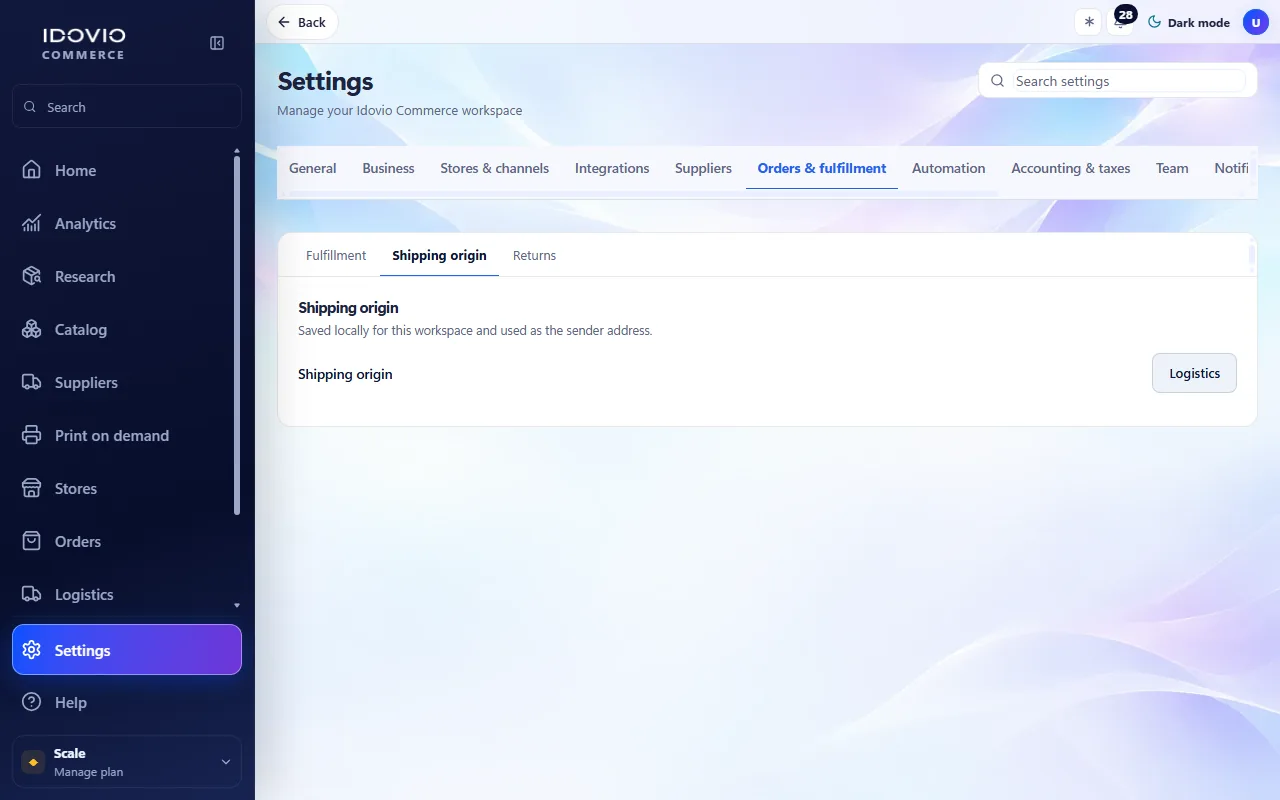
Shipping origin
Saved locally for this workspace and used as the sender address.
Screenshots show the interface in English.
Orders & fulfillment · Returns
Where it isSettings›Orders & fulfillment›Returns/settings/orders/returns
Settings on this page
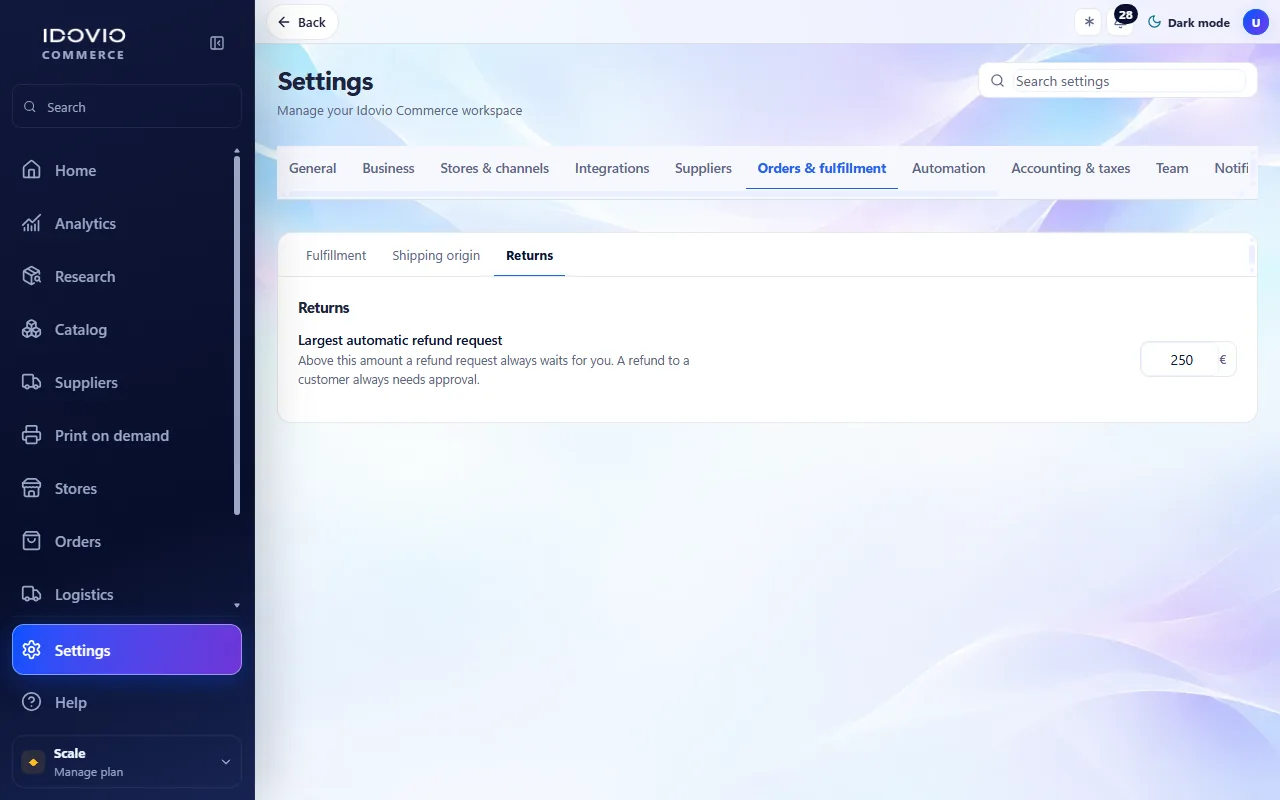
Largest automatic refund request
Above this amount a refund request always waits for you. A refund to a customer always needs approval.
Screenshots show the interface in English.
Automation · General
Where it isSettings›Automation›General/settings/automation/general
Settings on this page
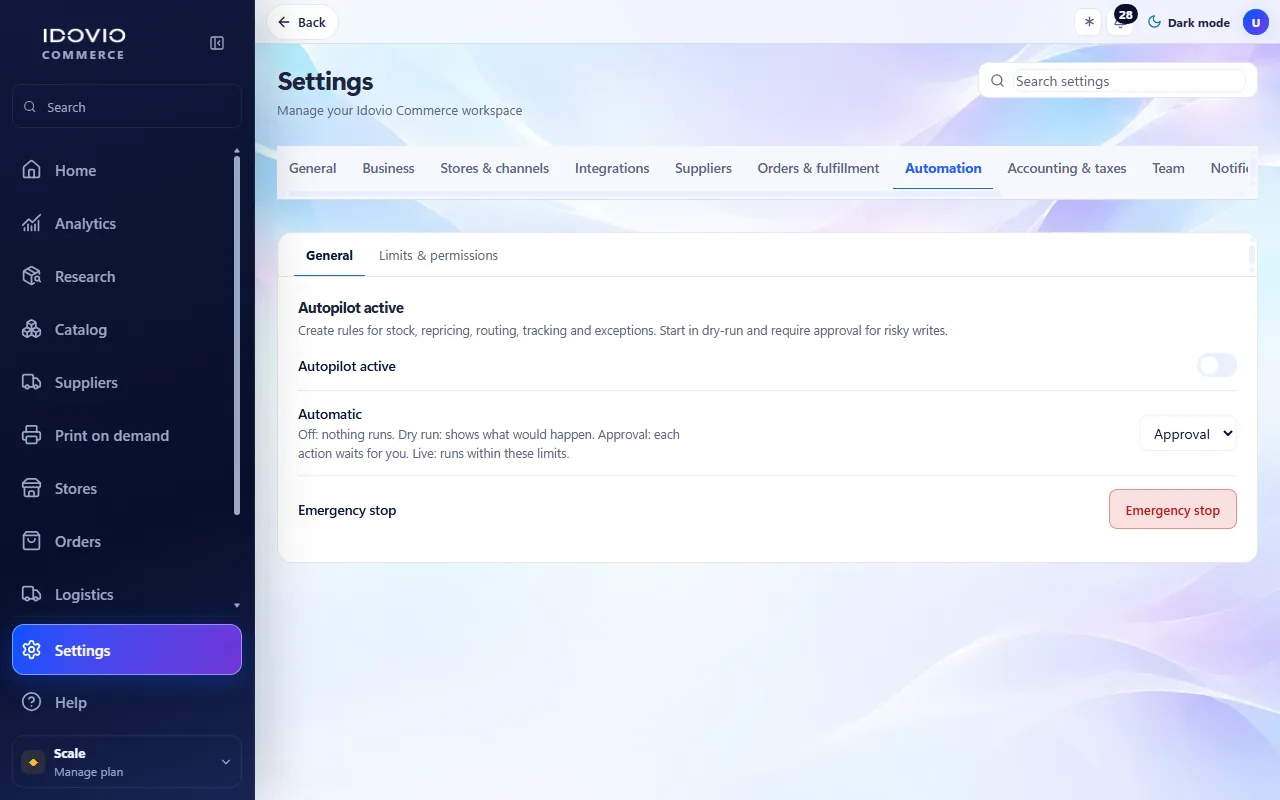
Autopilot active
Create rules for stock, repricing, routing, tracking and exceptions. Start in dry-run and require approval for risky writes.
Automatic
Off: nothing runs. Dry run: shows what would happen. Approval: each action waits for you. Live: runs within these limits.
Emergency stop
Screenshots show the interface in English.
Automation · Limits & permissions
Where it isSettings›Automation›Limits & permissions/settings/automation/limits
Settings on this page
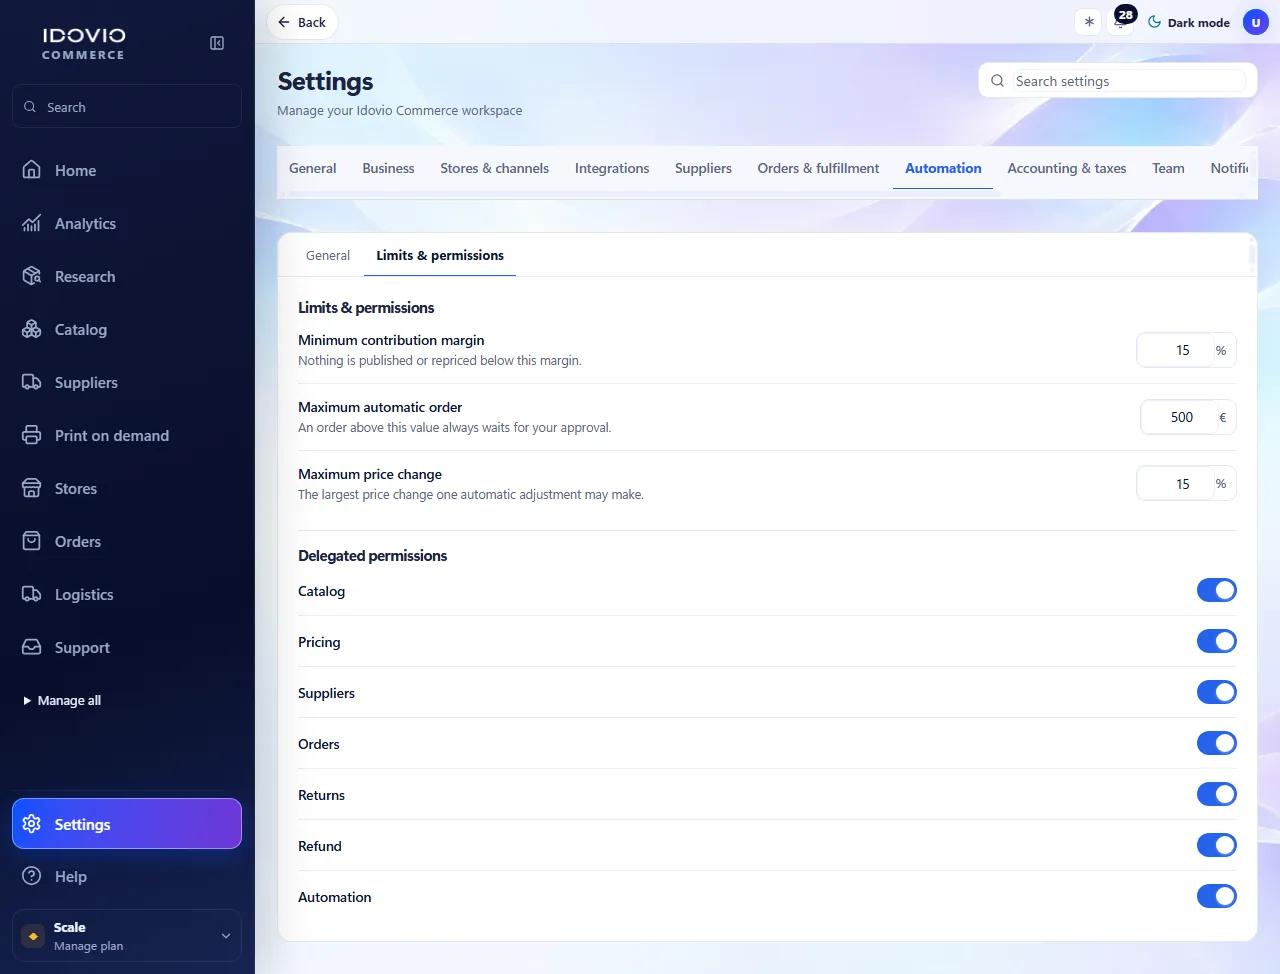
Minimum contribution margin
Nothing is published or repriced below this margin.
Maximum automatic order
An order above this value always waits for your approval.
Maximum price change
The largest price change one automatic adjustment may make.
Delegated permissions
Screenshots show the interface in English.
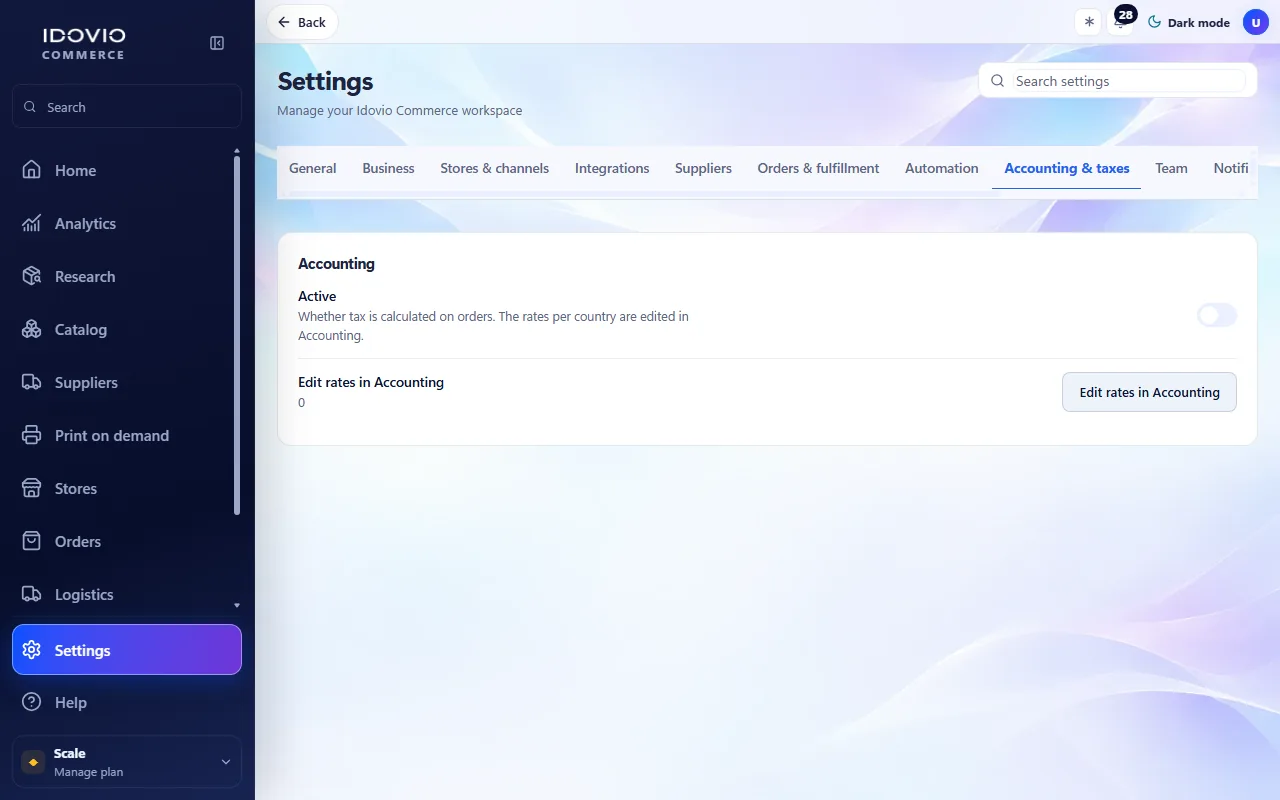
Accounting & taxes
Where it isSettings›Accounting & taxes/settings/accounting/tax
Settings on this page
Accounting
Whether tax is calculated on orders. The rates per country are edited in Accounting.
Screenshots show the interface in English.
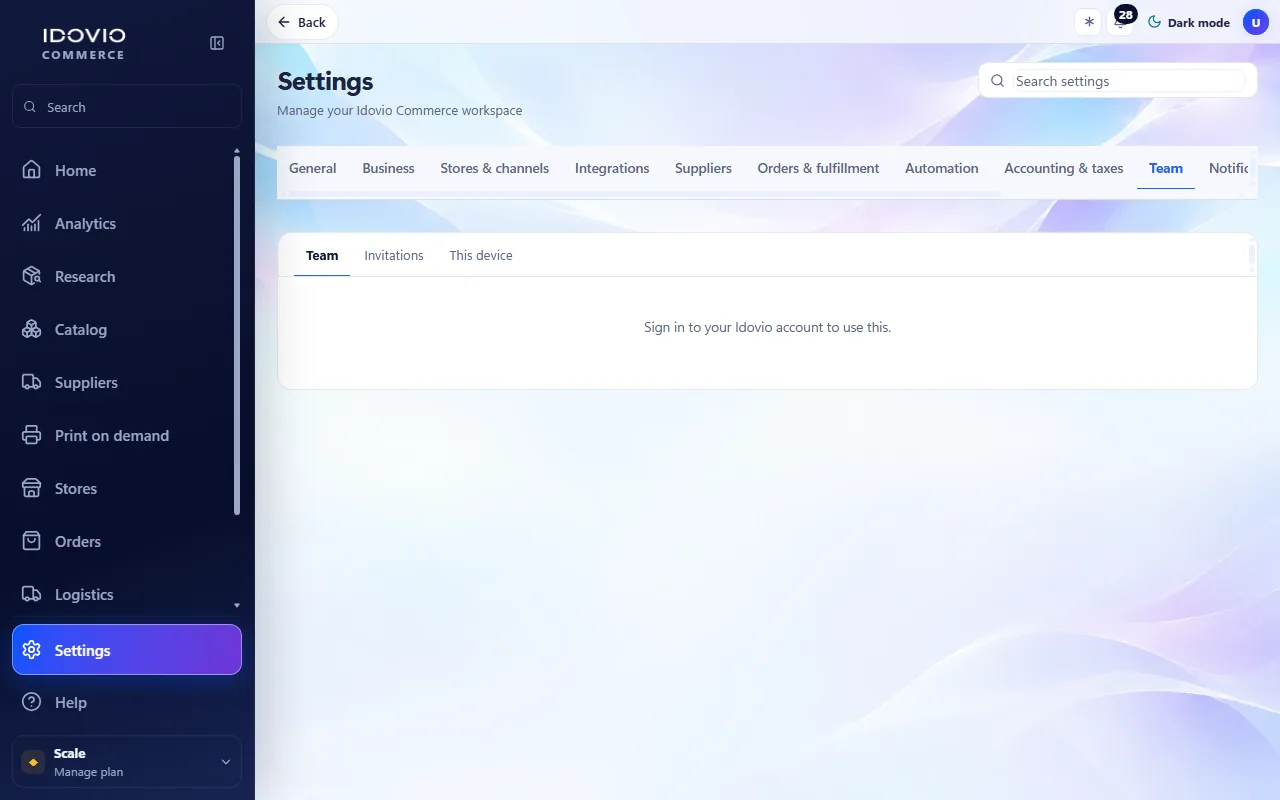
Team · Team
Where it isSettings›Team›Team/settings/team/members
Settings on this page
Team
Role
Remove
Screenshots show the interface in English.
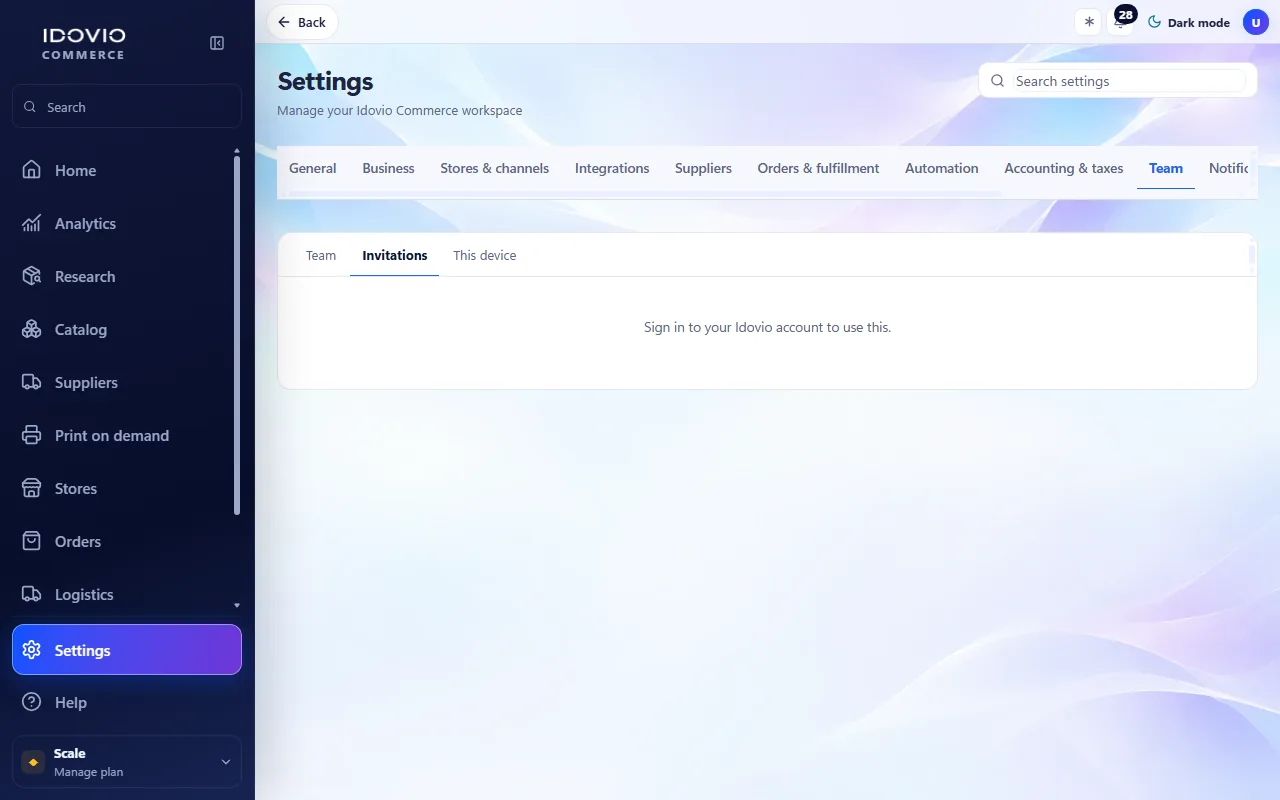
Team · Invitations
Where it isSettings›Team›Invitations/settings/team/invitations
Settings on this page
Invite by email
Pending invitations
Revoke
Screenshots show the interface in English.
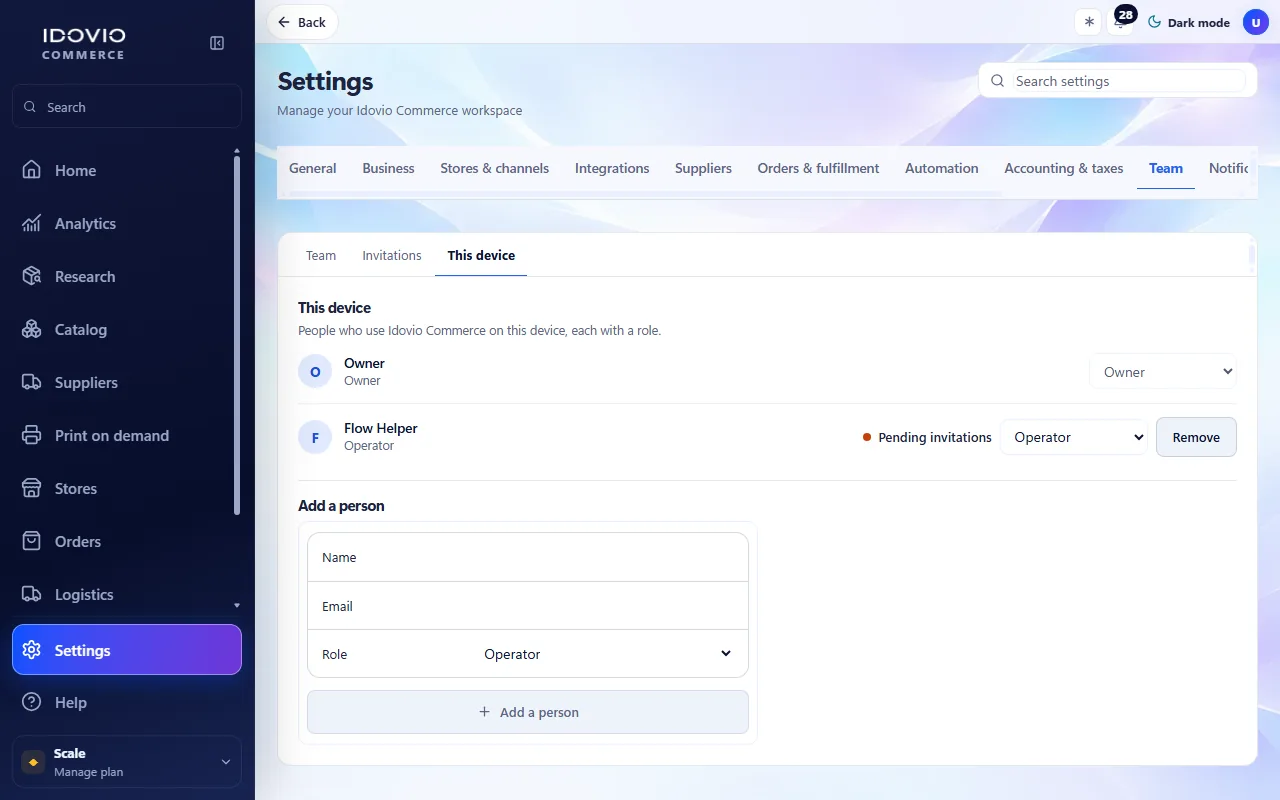
Team · This device
Where it isSettings›Team›This device/settings/team/device
Settings on this page
This device
People who use Idovio Commerce on this device, each with a role.
Add a person
Invitation code
Screenshots show the interface in English.
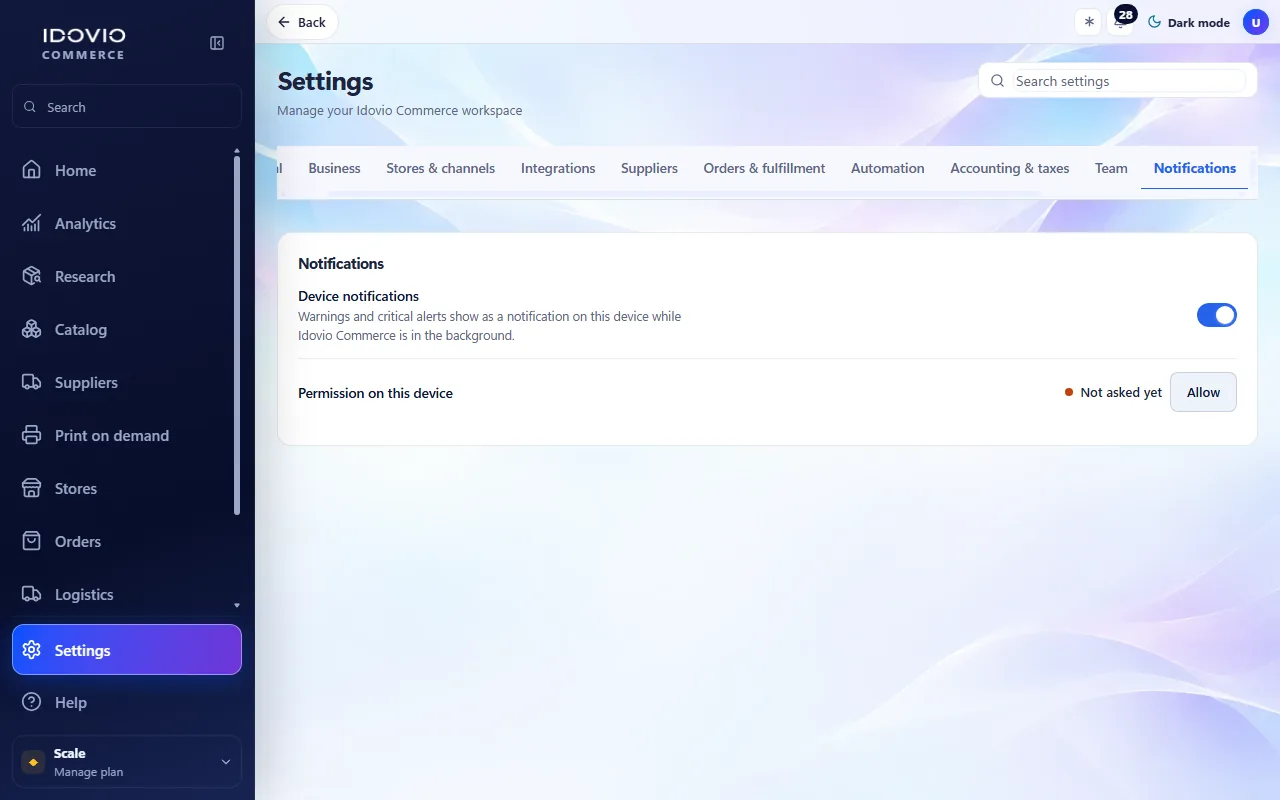
Notifications
Where it isSettings›Notifications/settings/notifications/general
Settings on this page
Device notifications
Warnings and critical alerts show as a notification on this device while Idovio Commerce is in the background.
Permission on this device
Send a test
Screenshots show the interface in English.
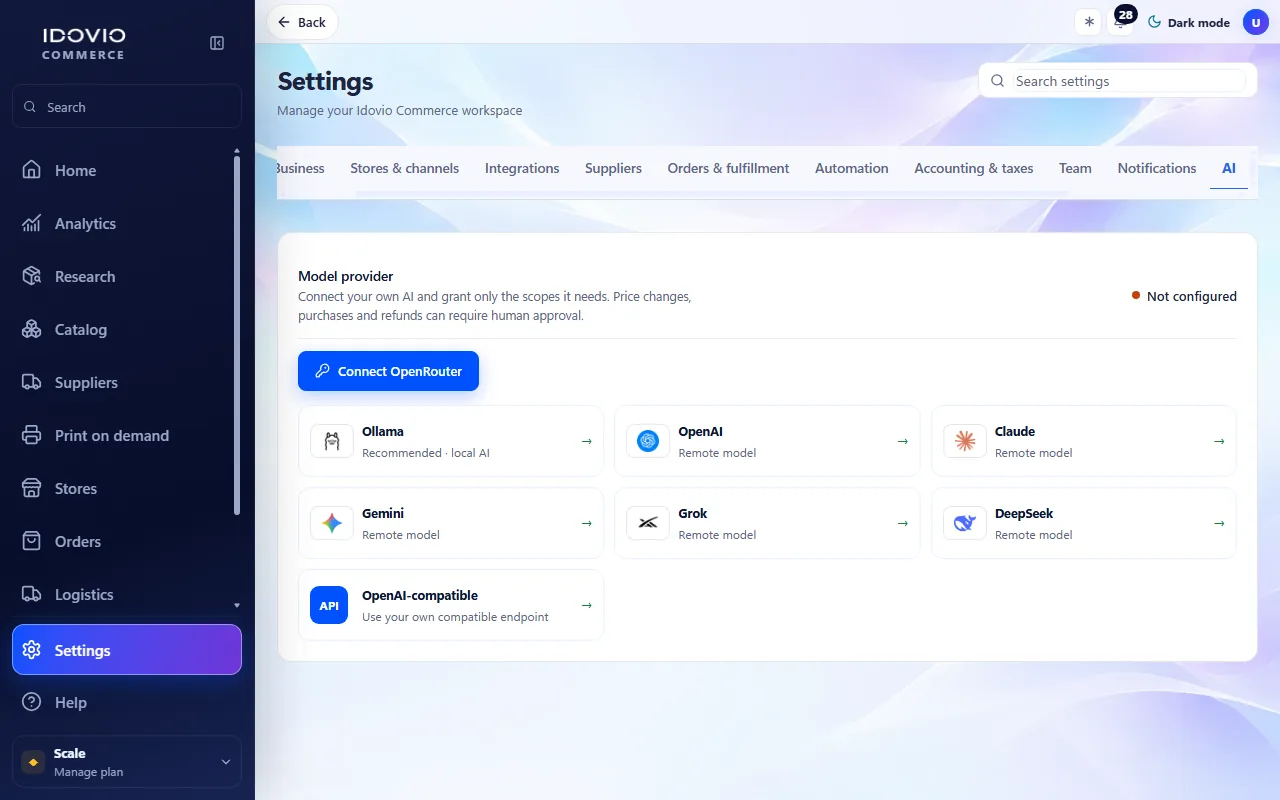
AI
Where it isSettings›AI/settings/ai/provider
Settings on this page
Model provider
Connect your own AI and grant only the scopes it needs. Price changes, purchases and refunds can require human approval.
Screenshots show the interface in English.
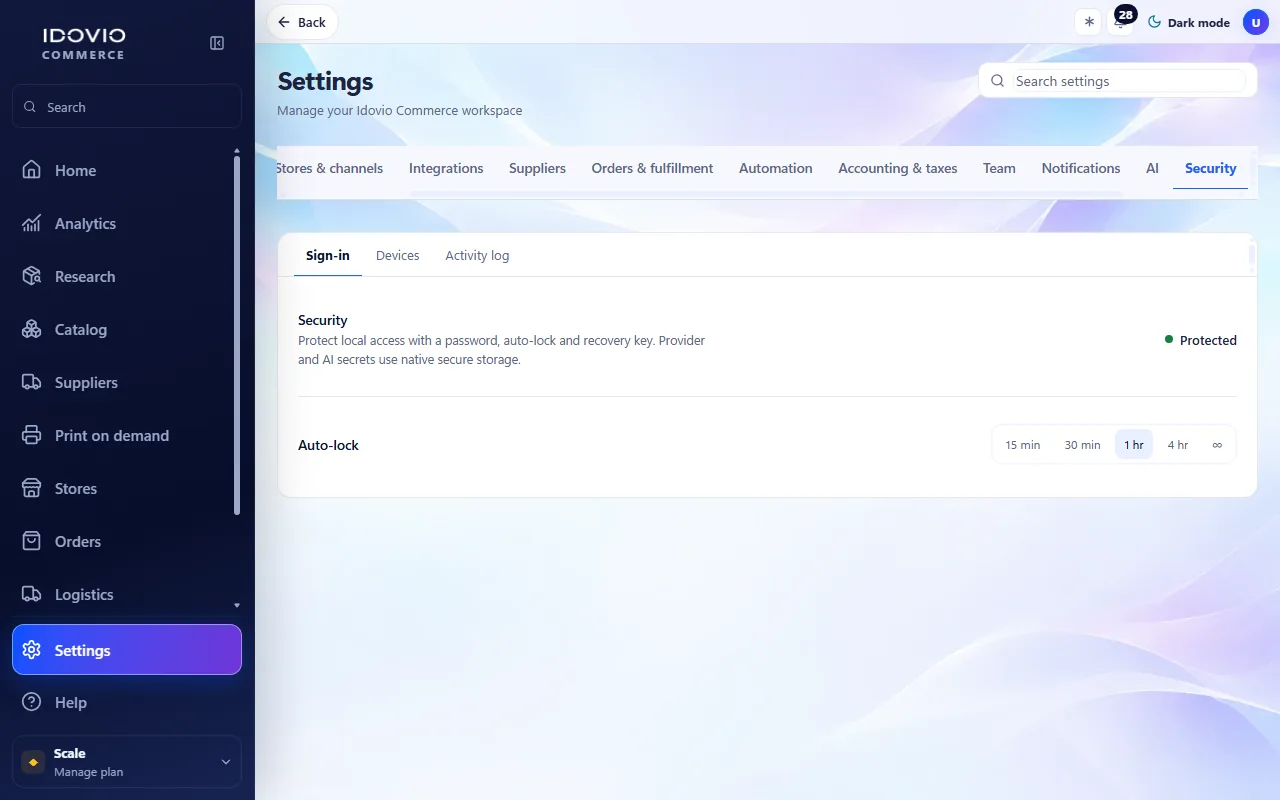
Security · Sign-in
Where it isSettings›Security›Sign-in/settings/security/signin
Settings on this page
Security
Protect local access with a password, auto-lock and recovery key. Provider and AI secrets use native secure storage.
Auto-lock
Screenshots show the interface in English.
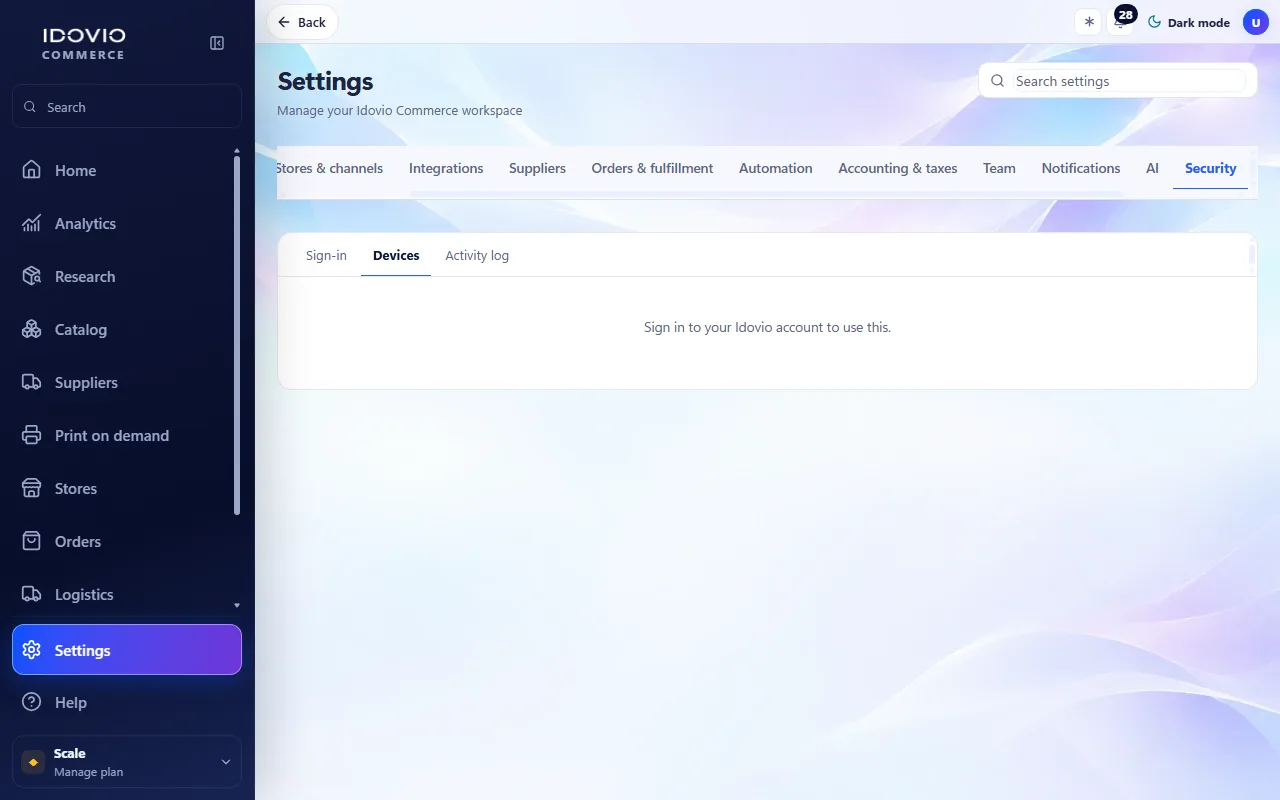
Security · Devices
Where it isSettings›Security›Devices/settings/security/devices
Settings on this page
Devices
Sign out everywhere else
Screenshots show the interface in English.
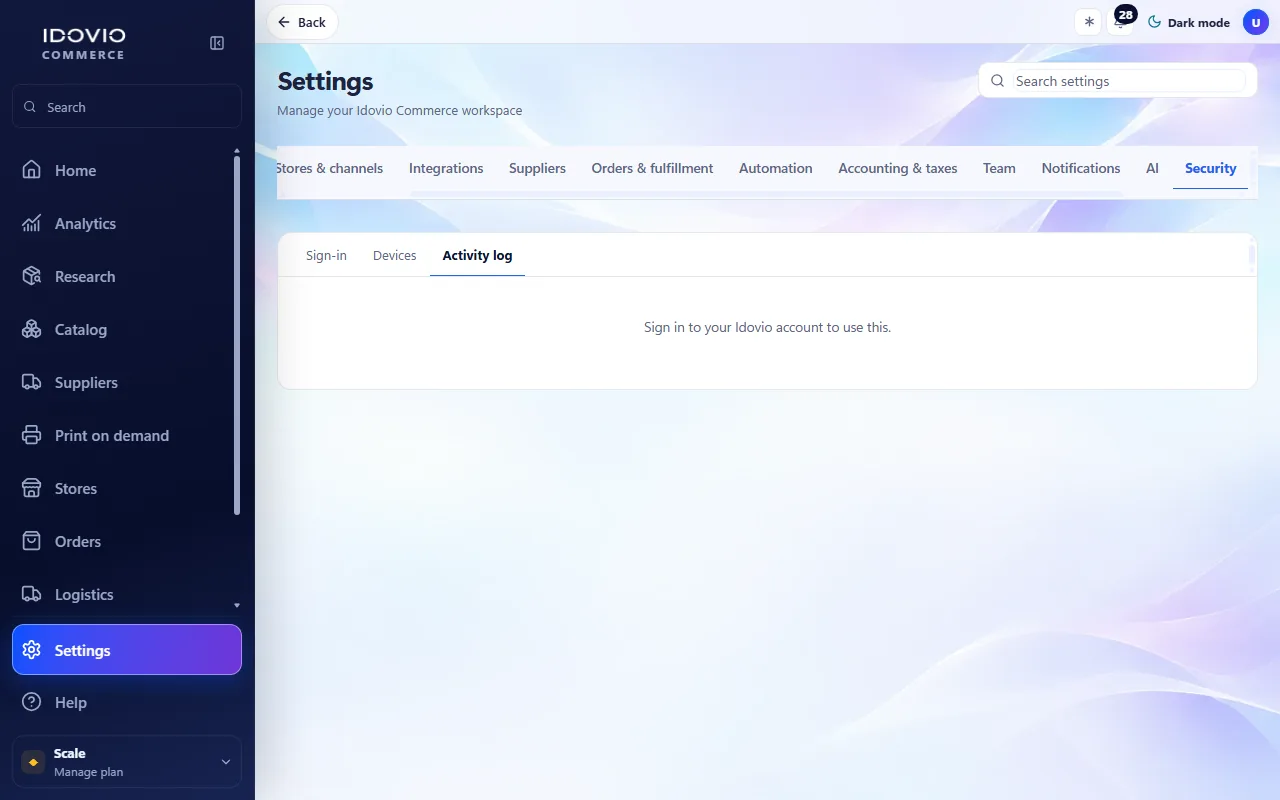
Security · Activity log
Where it isSettings›Security›Activity log/settings/security/activity
Settings on this page
Activity log
Screenshots show the interface in English.
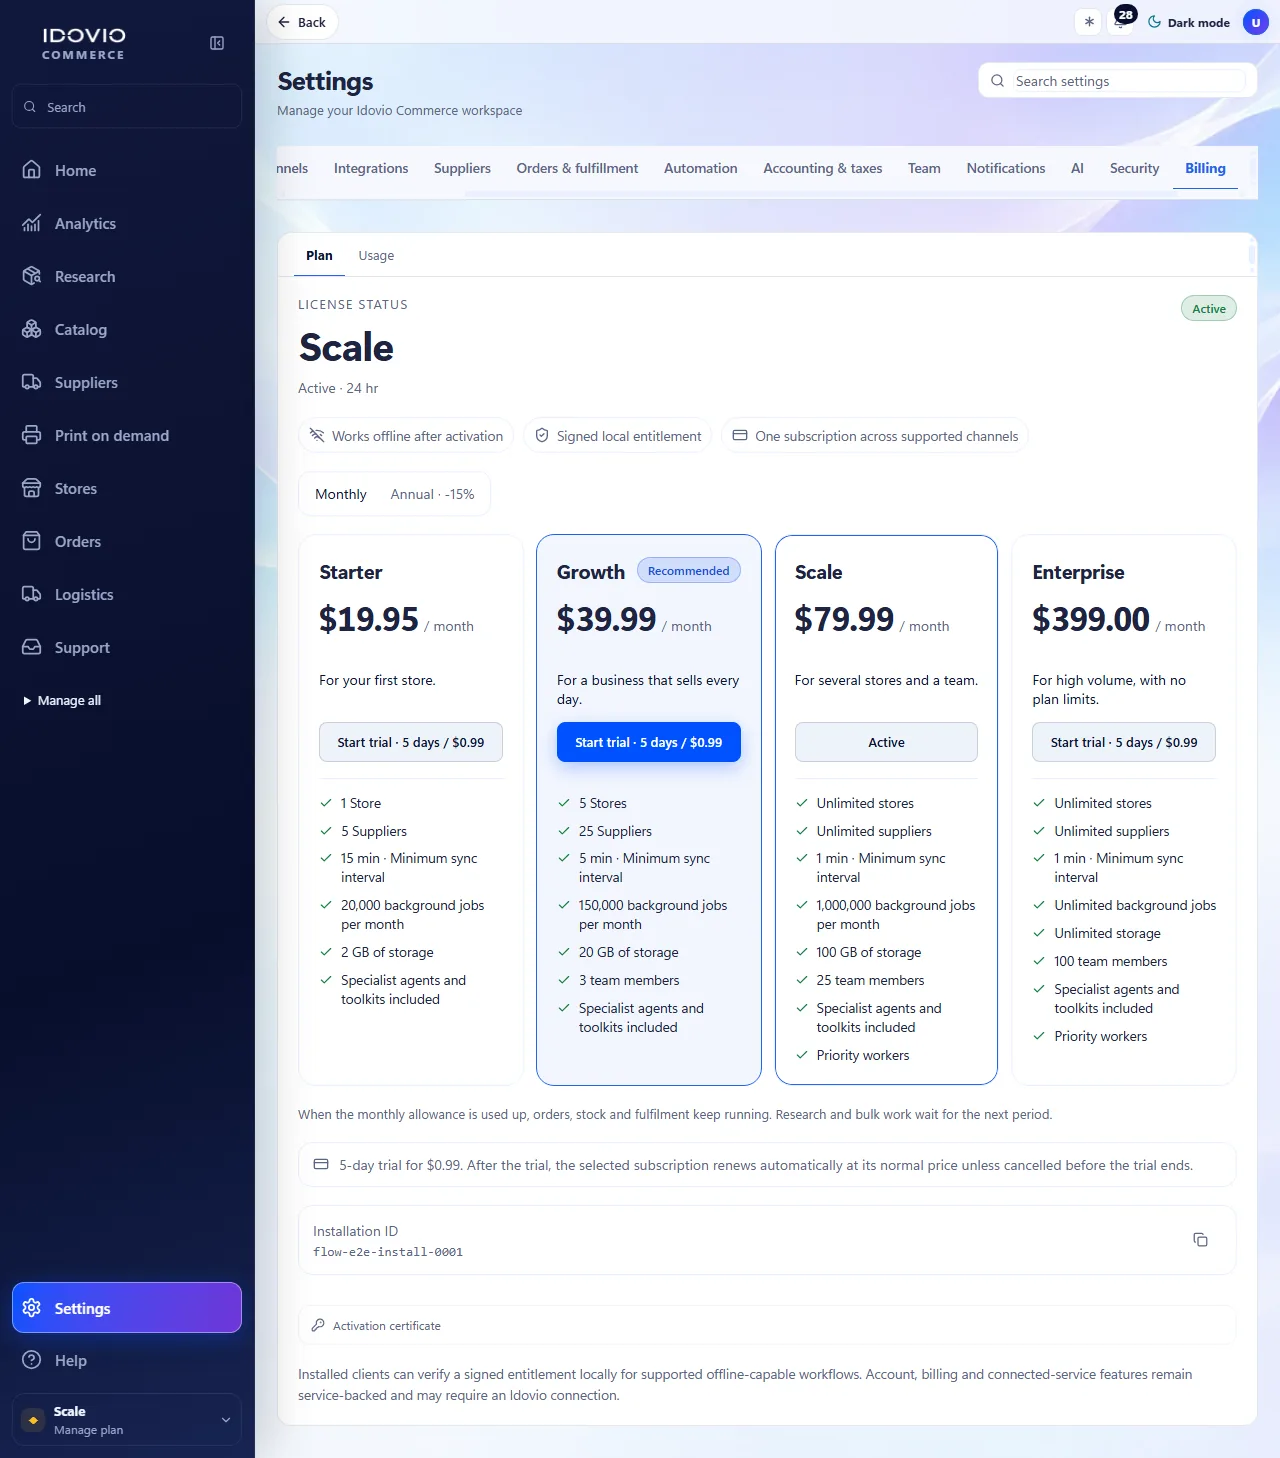
Billing · Plan
Where it isSettings›Billing›Plan/settings/billing/plan
Settings on this page
Plan
Idovio Commerce has no free plan. Try any subscription for 5 days for $0.99; after the trial, the selected plan renews automatically unless cancelled.
Screenshots show the interface in English.
Billing · Usage
Where it isSettings›Billing›Usage/settings/billing/usage
Settings on this page
Usage
Screenshots show the interface in English.
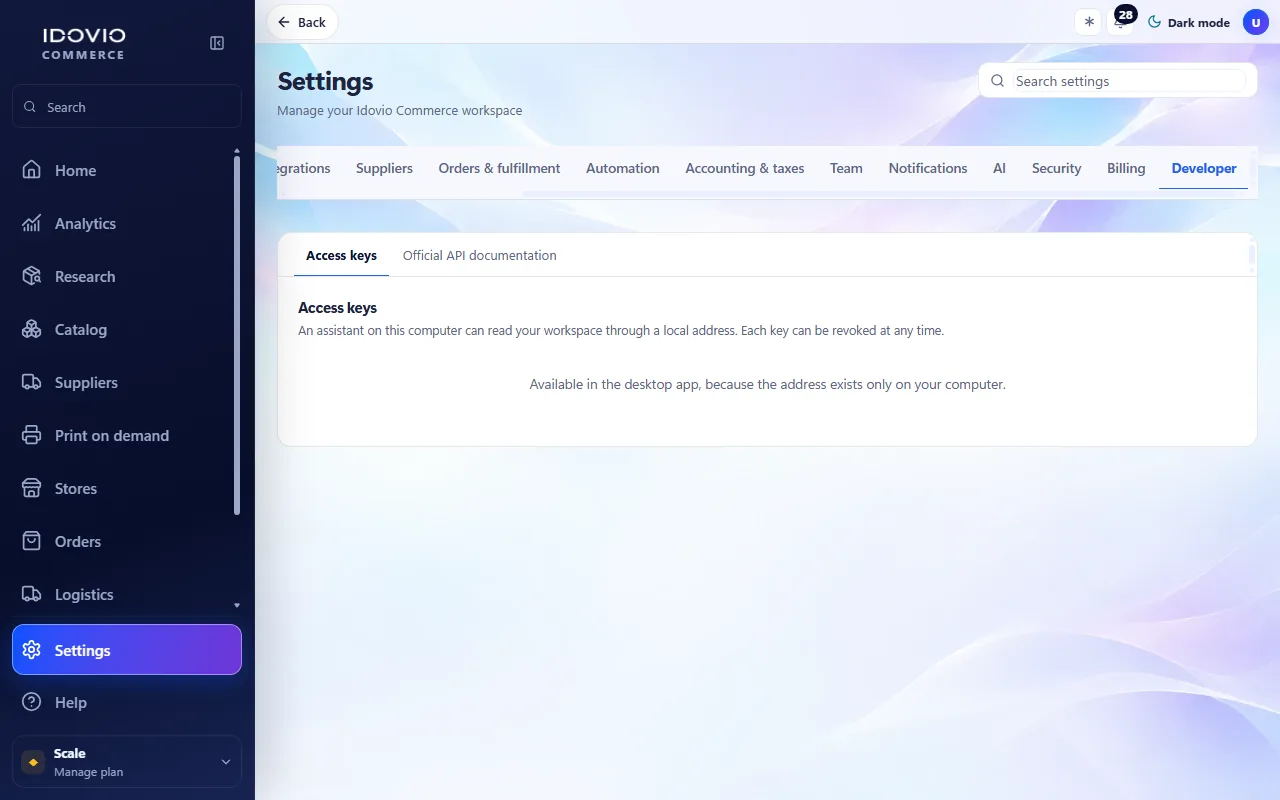
Developer · Access keys
Where it isSettings›Developer›Access keys/settings/developer/keys
Settings on this page
Access keys
An assistant on this computer can read your workspace through a local address. Each key can be revoked at any time.
Allow changes
Besides reading, the key can change prices, switch supplier and run automations.
Create key
Screenshots show the interface in English.
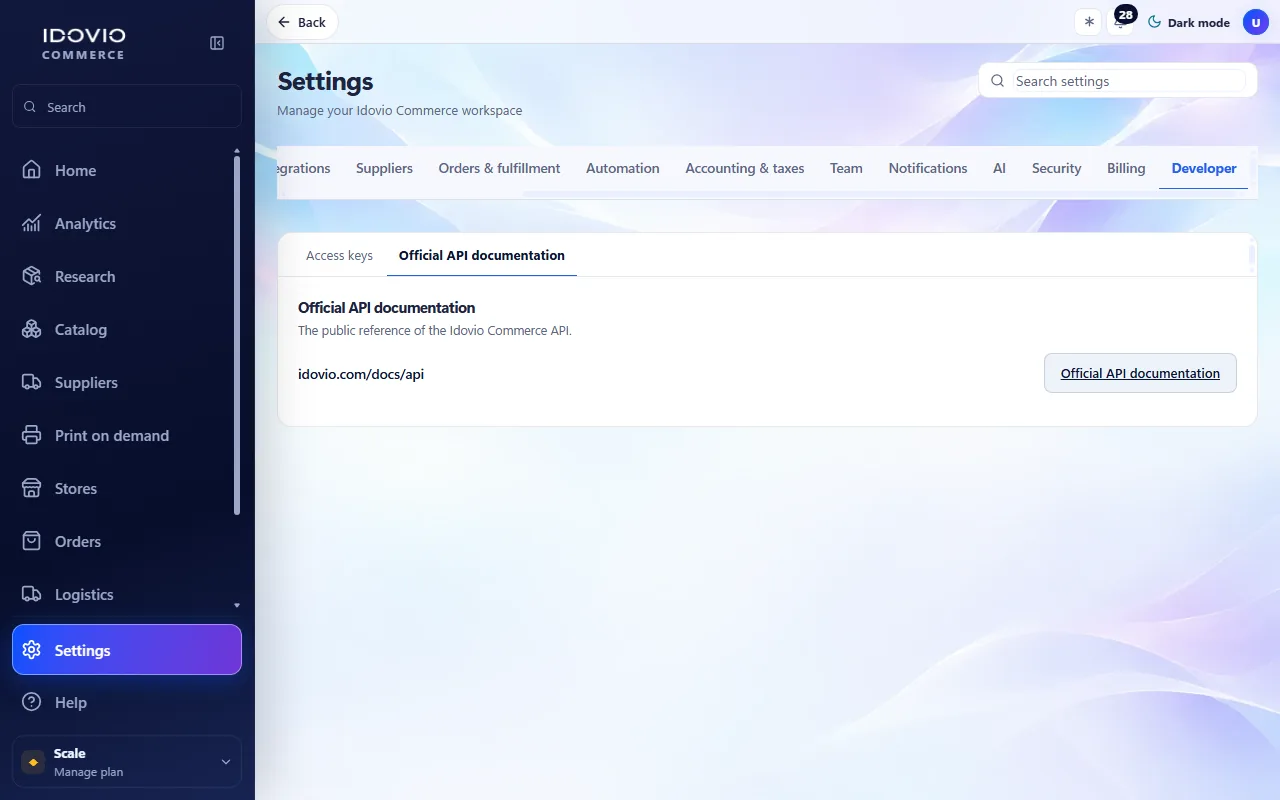
Developer · Official API documentation
Where it isSettings›Developer›Official API documentation/settings/developer/api
Settings on this page
Official API documentation
The public reference of the Idovio Commerce API.
Screenshots show the interface in English.
What you can connect
What you can connect
Where it isSide menu›Integrations
What it is forEverything you connect lives in one place. A connection only shows as connected after a real check against your account.
How to do it
Open Integration Hub, search for your store or marketplace and open its card.
Press “Connect”. If the provider offers sign-in, you approve access on its own page; if it works with a key, paste the key from your own account. Only the minimum data is asked.
When the card shows “Connected”, press “Sync now” to bring in your products and orders. If it shows “Reauthorization required”, press “Reconnect”.
EasyPost · Gmail · Google Ads · Meta Ads · Microsoft Outlook · Ollama · TikTok Ads · Universal IMAP
Screenshots show the interface in English.
Connectors, one by one
AliExpress
Where it isSide menu›Integrations›AliExpress
What it is forSuppliers. You sign in with your own account.
How to connect it
Open Integration Hub, search for your store or marketplace and open its card.
Press “Connect”. If the provider offers sign-in, you approve access on its own page; if it works with a key, paste the key from your own account. Only the minimum data is asked.
When the card shows “Connected”, press “Sync now” to bring in your products and orders. If it shows “Reauthorization required”, press “Reconnect”.
What this connection can do
Reads
Catalog · Pricing · Inventory · Logistics
Changes
Logistics · Orders. Every change first passes Profit Guard, your approval rules and the change log.
How to set it up afterwards
Open Settings › Suppliers and choose AliExpress in the list.
In its tabs, turn on “Own rules” to give it rules different from the general ones, change them and press “Save changes”.
To stop using it, press “Disconnect” on that same page.
What it is forSales channels. You sign in with your own account.
How to connect it
Open Integration Hub, search for your store or marketplace and open its card.
Press “Connect”. If the provider offers sign-in, you approve access on its own page; if it works with a key, paste the key from your own account. Only the minimum data is asked.
When the card shows “Connected”, press “Sync now” to bring in your products and orders. If it shows “Reauthorization required”, press “Reconnect”.
What this connection can do
Reads
Catalog · Inventory · Pricing · Orders
Changes
Catalog · Inventory · Pricing · Logistics. Every change first passes Profit Guard, your approval rules and the change log.
How to set it up afterwards
Open Settings › Stores & channels and choose Amazon in the list.
In its tabs, turn on “Own rules” to give it rules different from the general ones, change them and press “Save changes”.
To stop using it, press “Disconnect” on that same page.
What it is forSuppliers. Uses a key issued to your own account.
How to connect it
Open Integration Hub, search for your store or marketplace and open its card.
Press “Connect”. If the provider offers sign-in, you approve access on its own page; if it works with a key, paste the key from your own account. Only the minimum data is asked.
When the card shows “Connected”, press “Sync now” to bring in your products and orders. If it shows “Reauthorization required”, press “Reconnect”.
What this connection can do
What it asks you for
API key
Reads
Catalog · Inventory · Pricing
Changes
Orders. Every change first passes Profit Guard, your approval rules and the change log.
How to set it up afterwards
Open Settings › Suppliers and choose BigBuy in the list.
In its tabs, turn on “Own rules” to give it rules different from the general ones, change them and press “Save changes”.
To stop using it, press “Disconnect” on that same page.
What it is forPrint on demand. Uses a key issued to your own account.
How to connect it
Open Integration Hub, search for your store or marketplace and open its card.
Press “Connect”. If the provider offers sign-in, you approve access on its own page; if it works with a key, paste the key from your own account. Only the minimum data is asked.
When the card shows “Connected”, press “Sync now” to bring in your products and orders. If it shows “Reauthorization required”, press “Reconnect”.
What this connection can do
What it asks you for
API key
Reads
Catalog · Pricing · Logistics
Changes
Logistics. Every change first passes Profit Guard, your approval rules and the change log.
How to set it up afterwards
Open Settings › Suppliers and choose Bookvault in the list.
In its tabs, turn on “Own rules” to give it rules different from the general ones, change them and press “Save changes”.
To stop using it, press “Disconnect” on that same page.
What it is forSuppliers. Uses a key issued to your own account.
How to connect it
Open Integration Hub, search for your store or marketplace and open its card.
Press “Connect”. If the provider offers sign-in, you approve access on its own page; if it works with a key, paste the key from your own account. Only the minimum data is asked.
When the card shows “Connected”, press “Sync now” to bring in your products and orders. If it shows “Reauthorization required”, press “Reconnect”.
What this connection can do
What it asks you for
Your CJ API Key
Reads
Catalog · Inventory · Pricing · Logistics
Changes
Orders. Every change first passes Profit Guard, your approval rules and the change log.
How to set it up afterwards
Open Settings › Suppliers and choose CJ Dropshipping in the list.
In its tabs, turn on “Own rules” to give it rules different from the general ones, change them and press “Save changes”.
To stop using it, press “Disconnect” on that same page.
What it is forPrint on demand. Uses a key issued to your own account.
How to connect it
Open Integration Hub, search for your store or marketplace and open its card.
Press “Connect”. If the provider offers sign-in, you approve access on its own page; if it works with a key, paste the key from your own account. Only the minimum data is asked.
When the card shows “Connected”, press “Sync now” to bring in your products and orders. If it shows “Reauthorization required”, press “Reconnect”.
What this connection can do
What it asks you for
API key
Reads
Catalog · Pricing · Logistics
Changes
Logistics · Orders. Every change first passes Profit Guard, your approval rules and the change log.
How to set it up afterwards
Open Settings › Suppliers and choose Cloudprinter in the list.
In its tabs, turn on “Own rules” to give it rules different from the general ones, change them and press “Save changes”.
To stop using it, press “Disconnect” on that same page.
What it is forLogistics. Uses a key issued to your own account.
How to connect it
Open Integration Hub, search for your store or marketplace and open its card.
Press “Connect”. If the provider offers sign-in, you approve access on its own page; if it works with a key, paste the key from your own account. Only the minimum data is asked.
When the card shows “Connected”, press “Sync now” to bring in your products and orders. If it shows “Reauthorization required”, press “Reconnect”.
What this connection can do
What it asks you for
API key
Reads
Logistics
Changes
Logistics. Every change first passes Profit Guard, your approval rules and the change log.
How to set it up afterwards
Open Settings › Integrations and choose EasyPost in the list.
To stop using it, press “Disconnect” on that same page.
What it is forSales channels. You sign in with your own account.
How to connect it
Open Integration Hub, search for your store or marketplace and open its card.
Press “Connect”. If the provider offers sign-in, you approve access on its own page; if it works with a key, paste the key from your own account. Only the minimum data is asked.
When the card shows “Connected”, press “Sync now” to bring in your products and orders. If it shows “Reauthorization required”, press “Reconnect”.
What this connection can do
Reads
Catalog · Inventory · Pricing · Orders · Returns
Changes
Catalog · Inventory · Pricing · Logistics · Returns. Every change first passes Profit Guard, your approval rules and the change log.
How to set it up afterwards
Open Settings › Stores & channels and choose eBay in the list.
In its tabs, turn on “Own rules” to give it rules different from the general ones, change them and press “Save changes”.
To stop using it, press “Disconnect” on that same page.
What it is forSales channels. You sign in with your own account.
How to connect it
Open Integration Hub, search for your store or marketplace and open its card.
Press “Connect”. If the provider offers sign-in, you approve access on its own page; if it works with a key, paste the key from your own account. Only the minimum data is asked.
When the card shows “Connected”, press “Sync now” to bring in your products and orders. If it shows “Reauthorization required”, press “Reconnect”.
What this connection can do
Reads
Catalog · Inventory · Pricing · Orders
Changes
Catalog · Inventory · Pricing · Logistics. Every change first passes Profit Guard, your approval rules and the change log.
How to set it up afterwards
Open Settings › Stores & channels and choose Etsy in the list.
In its tabs, turn on “Own rules” to give it rules different from the general ones, change them and press “Save changes”.
To stop using it, press “Disconnect” on that same page.
What it is forPrint on demand. Uses a key issued to your own account.
How to connect it
Open Integration Hub, search for your store or marketplace and open its card.
Press “Connect”. If the provider offers sign-in, you approve access on its own page; if it works with a key, paste the key from your own account. Only the minimum data is asked.
When the card shows “Connected”, press “Sync now” to bring in your products and orders. If it shows “Reauthorization required”, press “Reconnect”.
What this connection can do
What it asks you for
API key
Reads
Catalog · Pricing · Logistics
Changes
Logistics · Orders. Every change first passes Profit Guard, your approval rules and the change log.
How to set it up afterwards
Open Settings › Suppliers and choose Gelato in the list.
In its tabs, turn on “Own rules” to give it rules different from the general ones, change them and press “Save changes”.
To stop using it, press “Disconnect” on that same page.
What it is forCommunication. You sign in with your own account.
How to connect it
Open Integration Hub, search for your store or marketplace and open its card.
Press “Connect”. If the provider offers sign-in, you approve access on its own page; if it works with a key, paste the key from your own account. Only the minimum data is asked.
When the card shows “Connected”, press “Sync now” to bring in your products and orders. If it shows “Reauthorization required”, press “Reconnect”.
What this connection can do
Reads
Communication
How to set it up afterwards
Open Settings › Integrations and choose Gmail in the list.
To stop using it, press “Disconnect” on that same page.
What it is forAdvertising. You sign in with your own account.
How to connect it
Open Integration Hub, search for your store or marketplace and open its card.
Press “Connect”. If the provider offers sign-in, you approve access on its own page; if it works with a key, paste the key from your own account. Only the minimum data is asked.
When the card shows “Connected”, press “Sync now” to bring in your products and orders. If it shows “Reauthorization required”, press “Reconnect”.
What this connection can do
Reads
Advertising
Changes
Advertising. Every change first passes Profit Guard, your approval rules and the change log.
How to set it up afterwards
Open Settings › Integrations and choose Google Ads in the list.
To stop using it, press “Disconnect” on that same page.
What it is forPrint on demand. Uses a key issued to your own account.
How to connect it
Open Integration Hub, search for your store or marketplace and open its card.
Press “Connect”. If the provider offers sign-in, you approve access on its own page; if it works with a key, paste the key from your own account. Only the minimum data is asked.
When the card shows “Connected”, press “Sync now” to bring in your products and orders. If it shows “Reauthorization required”, press “Reconnect”.
What this connection can do
What it asks you for
RecipeID · PartnerBillingKey
Reads
Catalog · Pricing · Logistics
Changes
Logistics · Orders. Every change first passes Profit Guard, your approval rules and the change log.
How to set it up afterwards
Open Settings › Suppliers and choose Gooten in the list.
In its tabs, turn on “Own rules” to give it rules different from the general ones, change them and press “Save changes”.
To stop using it, press “Disconnect” on that same page.
Where it isSide menu›Integrations›Idovio Commerce API
What it is forSales channels. For your own endpoint (advanced).
How to connect it
Open Integration Hub, search for your store or marketplace and open its card.
Press “Connect”. If the provider offers sign-in, you approve access on its own page; if it works with a key, paste the key from your own account. Only the minimum data is asked.
When the card shows “Connected”, press “Sync now” to bring in your products and orders. If it shows “Reauthorization required”, press “Reconnect”.
What this connection can do
What it asks you for
Store URL · API key
Reads
Catalog · Inventory · Pricing · Orders
Changes
Catalog · Inventory · Pricing · Logistics · Returns. Every change first passes Profit Guard, your approval rules and the change log.
How to set it up afterwards
Open Settings › Stores & channels and choose Idovio Commerce API in the list.
In its tabs, turn on “Own rules” to give it rules different from the general ones, change them and press “Save changes”.
To stop using it, press “Disconnect” on that same page.
What it is forSales channels. Uses a key issued to your own account.
How to connect it
Open Integration Hub, search for your store or marketplace and open its card.
Press “Connect”. If the provider offers sign-in, you approve access on its own page; if it works with a key, paste the key from your own account. Only the minimum data is asked.
When the card shows “Connected”, press “Sync now” to bring in your products and orders. If it shows “Reauthorization required”, press “Reconnect”.
What this connection can do
What it asks you for
API key
Reads
Orders
How to set it up afterwards
Open Settings › Stores & channels and choose Lemon Squeezy in the list.
In its tabs, turn on “Own rules” to give it rules different from the general ones, change them and press “Save changes”.
To stop using it, press “Disconnect” on that same page.
What it is forPrint on demand. Uses a key issued to your own account.
How to connect it
Open Integration Hub, search for your store or marketplace and open its card.
Press “Connect”. If the provider offers sign-in, you approve access on its own page; if it works with a key, paste the key from your own account. Only the minimum data is asked.
When the card shows “Connected”, press “Sync now” to bring in your products and orders. If it shows “Reauthorization required”, press “Reconnect”.
What this connection can do
What it asks you for
Client key · Client secret
Reads
Catalog · Pricing · Logistics
Changes
Logistics · Orders. Every change first passes Profit Guard, your approval rules and the change log.
How to set it up afterwards
Open Settings › Suppliers and choose Lulu Direct in the list.
In its tabs, turn on “Own rules” to give it rules different from the general ones, change them and press “Save changes”.
To stop using it, press “Disconnect” on that same page.
What it is forAdvertising. You sign in with your own account.
How to connect it
Open Integration Hub, search for your store or marketplace and open its card.
Press “Connect”. If the provider offers sign-in, you approve access on its own page; if it works with a key, paste the key from your own account. Only the minimum data is asked.
When the card shows “Connected”, press “Sync now” to bring in your products and orders. If it shows “Reauthorization required”, press “Reconnect”.
What this connection can do
Reads
Advertising
Changes
Advertising. Every change first passes Profit Guard, your approval rules and the change log.
How to set it up afterwards
Open Settings › Integrations and choose Meta Ads in the list.
To stop using it, press “Disconnect” on that same page.
Where it isSide menu›Integrations›Microsoft Outlook
What it is forCommunication. You sign in with your own account.
How to connect it
Open Integration Hub, search for your store or marketplace and open its card.
Press “Connect”. If the provider offers sign-in, you approve access on its own page; if it works with a key, paste the key from your own account. Only the minimum data is asked.
When the card shows “Connected”, press “Sync now” to bring in your products and orders. If it shows “Reauthorization required”, press “Reconnect”.
What this connection can do
Reads
Communication
How to set it up afterwards
Open Settings › Integrations and choose Microsoft Outlook in the list.
To stop using it, press “Disconnect” on that same page.
What it is forArtificial intelligence. Runs on this device.
How to connect it
Open Integration Hub, search for your store or marketplace and open its card.
Press “Connect”. If the provider offers sign-in, you approve access on its own page; if it works with a key, paste the key from your own account. Only the minimum data is asked.
When the card shows “Connected”, press “Sync now” to bring in your products and orders. If it shows “Reauthorization required”, press “Reconnect”.
What this connection can do
Changes
Artificial intelligence. Every change first passes Profit Guard, your approval rules and the change log.
How to set it up afterwards
Open Settings › Integrations and choose Ollama in the list.
To stop using it, press “Disconnect” on that same page.
Open Integration Hub, search for your store or marketplace and open its card.
Press “Connect”. If the provider offers sign-in, you approve access on its own page; if it works with a key, paste the key from your own account. Only the minimum data is asked.
When the card shows “Connected”, press “Sync now” to bring in your products and orders. If it shows “Reauthorization required”, press “Reconnect”.
What this connection can do
Reads
Catalog · Inventory · Pricing
Changes
Orders · Returns. Every change first passes Profit Guard, your approval rules and the change log.
How to set it up afterwards
Open Settings › Suppliers and choose Own Warehouse in the list.
To stop using it, press “Disconnect” on that same page.
What it is forSales channels. Uses a key issued to your own account.
How to connect it
Open Integration Hub, search for your store or marketplace and open its card.
Press “Connect”. If the provider offers sign-in, you approve access on its own page; if it works with a key, paste the key from your own account. Only the minimum data is asked.
When the card shows “Connected”, press “Sync now” to bring in your products and orders. If it shows “Reauthorization required”, press “Reconnect”.
What this connection can do
What it asks you for
API key
Reads
Orders
How to set it up afterwards
Open Settings › Stores & channels and choose Paddle in the list.
In its tabs, turn on “Own rules” to give it rules different from the general ones, change them and press “Save changes”.
To stop using it, press “Disconnect” on that same page.
What it is forPrint on demand. You sign in with your own account.
How to connect it
Open Integration Hub, search for your store or marketplace and open its card.
Press “Connect”. If the provider offers sign-in, you approve access on its own page; if it works with a key, paste the key from your own account. Only the minimum data is asked.
When the card shows “Connected”, press “Sync now” to bring in your products and orders. If it shows “Reauthorization required”, press “Reconnect”.
What this connection can do
Reads
Catalog · Pricing · Inventory · Logistics
Changes
Logistics · Orders. Every change first passes Profit Guard, your approval rules and the change log.
How to set it up afterwards
Open Settings › Suppliers and choose Printful in the list.
In its tabs, turn on “Own rules” to give it rules different from the general ones, change them and press “Save changes”.
To stop using it, press “Disconnect” on that same page.
What it is forPrint on demand. You sign in with your own account.
How to connect it
Open Integration Hub, search for your store or marketplace and open its card.
Press “Connect”. If the provider offers sign-in, you approve access on its own page; if it works with a key, paste the key from your own account. Only the minimum data is asked.
When the card shows “Connected”, press “Sync now” to bring in your products and orders. If it shows “Reauthorization required”, press “Reconnect”.
What this connection can do
Reads
Catalog · Pricing · Inventory · Logistics
Changes
Logistics · Orders · Returns. Every change first passes Profit Guard, your approval rules and the change log.
How to set it up afterwards
Open Settings › Suppliers and choose Printify in the list.
In its tabs, turn on “Own rules” to give it rules different from the general ones, change them and press “Save changes”.
To stop using it, press “Disconnect” on that same page.
What it is forPrint on demand. Uses a key issued to your own account.
How to connect it
Open Integration Hub, search for your store or marketplace and open its card.
Press “Connect”. If the provider offers sign-in, you approve access on its own page; if it works with a key, paste the key from your own account. Only the minimum data is asked.
When the card shows “Connected”, press “Sync now” to bring in your products and orders. If it shows “Reauthorization required”, press “Reconnect”.
What this connection can do
What it asks you for
API key
Reads
Catalog · Pricing · Logistics
Changes
Logistics · Orders. Every change first passes Profit Guard, your approval rules and the change log.
How to set it up afterwards
Open Settings › Suppliers and choose Prodigi in the list.
In its tabs, turn on “Own rules” to give it rules different from the general ones, change them and press “Save changes”.
To stop using it, press “Disconnect” on that same page.
What it is forPrint on demand. Uses a key issued to your own account.
How to connect it
Open Integration Hub, search for your store or marketplace and open its card.
Press “Connect”. If the provider offers sign-in, you approve access on its own page; if it works with a key, paste the key from your own account. Only the minimum data is asked.
When the card shows “Connected”, press “Sync now” to bring in your products and orders. If it shows “Reauthorization required”, press “Reconnect”.
What this connection can do
What it asks you for
API key
Reads
Catalog · Pricing · Logistics
Changes
Logistics · Orders. Every change first passes Profit Guard, your approval rules and the change log.
How to set it up afterwards
Open Settings › Suppliers and choose Shirtigo in the list.
In its tabs, turn on “Own rules” to give it rules different from the general ones, change them and press “Save changes”.
To stop using it, press “Disconnect” on that same page.
What it is forSales channels. Uses a key issued to your own account.
How to connect it
Open Integration Hub, search for your store or marketplace and open its card.
Press “Connect”. If the provider offers sign-in, you approve access on its own page; if it works with a key, paste the key from your own account. Only the minimum data is asked.
When the card shows “Connected”, press “Sync now” to bring in your products and orders. If it shows “Reauthorization required”, press “Reconnect”.
What this connection can do
Reads
Catalog · Inventory · Pricing · Orders
Changes
Catalog · Inventory · Pricing. Every change first passes Profit Guard, your approval rules and the change log.
How to set it up afterwards
Open Settings › Stores & channels and choose Shopify in the list.
In its tabs, turn on “Own rules” to give it rules different from the general ones, change them and press “Save changes”.
To stop using it, press “Disconnect” on that same page.
What it is forSales channels. Uses a key issued to your own account.
How to connect it
Open Integration Hub, search for your store or marketplace and open its card.
Press “Connect”. If the provider offers sign-in, you approve access on its own page; if it works with a key, paste the key from your own account. Only the minimum data is asked.
When the card shows “Connected”, press “Sync now” to bring in your products and orders. If it shows “Reauthorization required”, press “Reconnect”.
What this connection can do
What it asks you for
API key
Reads
Orders
Changes
Returns. Every change first passes Profit Guard, your approval rules and the change log.
How to set it up afterwards
Open Settings › Stores & channels and choose Stripe in the list.
In its tabs, turn on “Own rules” to give it rules different from the general ones, change them and press “Save changes”.
To stop using it, press “Disconnect” on that same page.
What it is forAdvertising. You sign in with your own account.
How to connect it
Open Integration Hub, search for your store or marketplace and open its card.
Press “Connect”. If the provider offers sign-in, you approve access on its own page; if it works with a key, paste the key from your own account. Only the minimum data is asked.
When the card shows “Connected”, press “Sync now” to bring in your products and orders. If it shows “Reauthorization required”, press “Reconnect”.
What this connection can do
Reads
Advertising
Changes
Advertising. Every change first passes Profit Guard, your approval rules and the change log.
How to set it up afterwards
Open Settings › Integrations and choose TikTok Ads in the list.
To stop using it, press “Disconnect” on that same page.
What it is forSales channels. You sign in with your own account.
How to connect it
Open Integration Hub, search for your store or marketplace and open its card.
Press “Connect”. If the provider offers sign-in, you approve access on its own page; if it works with a key, paste the key from your own account. Only the minimum data is asked.
When the card shows “Connected”, press “Sync now” to bring in your products and orders. If it shows “Reauthorization required”, press “Reconnect”.
What this connection can do
Reads
Catalog · Inventory · Pricing · Orders · Returns
Changes
Catalog · Inventory · Pricing · Logistics. Every change first passes Profit Guard, your approval rules and the change log.
How to set it up afterwards
Open Settings › Stores & channels and choose TikTok Shop in the list.
In its tabs, turn on “Own rules” to give it rules different from the general ones, change them and press “Save changes”.
To stop using it, press “Disconnect” on that same page.
What it is forCommunication. Uses a key issued to your own account.
How to connect it
Open Integration Hub, search for your store or marketplace and open its card.
Press “Connect”. If the provider offers sign-in, you approve access on its own page; if it works with a key, paste the key from your own account. Only the minimum data is asked.
When the card shows “Connected”, press “Sync now” to bring in your products and orders. If it shows “Reauthorization required”, press “Reconnect”.
What this connection can do
Reads
Communication
How to set it up afterwards
Open Settings › Integrations and choose Universal IMAP in the list.
To stop using it, press “Disconnect” on that same page.
What it is forSales channels. Uses a key issued to your own account.
How to connect it
Open Integration Hub, search for your store or marketplace and open its card.
Press “Connect”. If the provider offers sign-in, you approve access on its own page; if it works with a key, paste the key from your own account. Only the minimum data is asked.
When the card shows “Connected”, press “Sync now” to bring in your products and orders. If it shows “Reauthorization required”, press “Reconnect”.
What this connection can do
What it asks you for
Site ID · API key
Reads
Catalog · Inventory · Pricing · Orders
Changes
Catalog · Inventory · Pricing · Logistics. Every change first passes Profit Guard, your approval rules and the change log.
How to set it up afterwards
Open Settings › Stores & channels and choose Wix in the list.
In its tabs, turn on “Own rules” to give it rules different from the general ones, change them and press “Save changes”.
To stop using it, press “Disconnect” on that same page.
What it is forSales channels. Uses a key issued to your own account.
How to connect it
Open Integration Hub, search for your store or marketplace and open its card.
Press “Connect”. If the provider offers sign-in, you approve access on its own page; if it works with a key, paste the key from your own account. Only the minimum data is asked.
When the card shows “Connected”, press “Sync now” to bring in your products and orders. If it shows “Reauthorization required”, press “Reconnect”.
What this connection can do
What it asks you for
Store URL · Consumer key · Consumer secret
Reads
Catalog · Inventory · Pricing · Orders
Changes
Catalog · Inventory · Pricing · Returns. Every change first passes Profit Guard, your approval rules and the change log.
How to set it up afterwards
Open Settings › Stores & channels and choose WooCommerce in the list.
In its tabs, turn on “Own rules” to give it rules different from the general ones, change them and press “Save changes”.
To stop using it, press “Disconnect” on that same page.